Friday, June 3, 2016

Super-Duper Small Gummi Sushi! Yes, you can be a sushi chef too!

Dale and I were running errands today, and we stopped by a great shop near us called, Rocket Fizz.  It's a super-cool candy and soda shop, and they had these gummi kits from Japan.  You made your own gummies and then assembled them to look like different foods.  

Of course I had to get the sushi kit.  I love novel and quirky things like this.  It's very detailed oriented, looks nearly really, and it's miniature!  My favorite criteria!

It's called "Poppin' Cookin' Sushi Kit" and it was really fun to make.  After we downloaded the English instructions from HERE.  The instructions on the box are fine, if you are fluent in reading Japanese!  There are pictures, but in this case, they are not worth a thousand words.

Here is the box.  It's about the size of...well, a box of tampons.  That's really all I could think to compare it to.
This plastic pouch is inside, but don't just rush in and tear it open.  You need to cut where it indicates because you use this as your templates and "plates."
After you cut open the pouch, remove this tray and all of the mysterious packets and hardware.  That little spoon is cute and looks like a tiny spade.
I trimmed the edges of the pouch.
Here are the different color coded packets of mix, the mixing tray, and the squeezy thing, and spoon.
The first thing I did was mix up the rice.  I just used a small spoon to spoon in the minute amounts of water you're suppose to use.  This mixture reminded me of when I attempted to make my own rice cakes.  Now, that was an utter failure, but I won't bore you with the details on that.  Back to our clever sushi!
So, after I made the "Tamago" or "egg omelet," I moved to the "tuna" or "Maguro."  It was nice that you didn't have to work really quickly, but I didn't want to lollygag.  Can you believe that the word "lollygag" didn't show up as a misspelled word?  Ha!
Making the "salmon roe" or "salmon eggs" was THE COOLEST thing I've done all year.  I felt like one of those super-hip molecular chefs.  Just follow the instructions and you cannot go wrong!  The results are amazing, and a little gross, but they do look like fish eggs when you are finished!  This reminded me of that novelty soda in the early 90's called Orbit.  Anyone remember that?
There was a little black stick of candy that you roll out, while using the handy template on the pouch wrapper.  I improvised and was able to make another strip of "Nori" or "seaweed paper" for my tiny omelette sushi.
After all of my ingredients were prepared, it was time to make some sushi!  I took the rice and used the little template to pack together into little cakes for my omelette and tuna.
I also took a piece of the seaweed paper and made into a ring and pushed a little rice into it.  Then I spooned in some of the salmon eggs.  I was thrilled by how real they looked, all plump and shiny!
After I assembled the other pieces of sushi, I assembled the "tuna tower" by using some of the tuna and egg, and chopping them up roughly with my spade spoon.  Then I had to carefully top off some rice that I shaped into a disc.  Working in miniature is a lot harder than you would think!
These were so adorable and merited me pulling out my Nikon and snapping some macro pictures.  The tuna almost looks like the real thing!

I tried one piece and it was so fruity and jellied that it was a bit overwhelming for me.  Something tasted really strong of peach, and well, I loath peach!  Dale gobbled up the remaining "meal."  He even used some the candy mix for "soy sauce."  I kept searching for the wasabi and pickled ginger...but to no avail.

There were other kits, and I think we will get them when Dale's boys, John and Nicholas come out.  This will be a good project for them.  There were burgers, pizzas, and that was all I recalled seeing. 

If you are ever in the Colorado Springs area on the north end of Nevada, you need to check out this candy shop.  I was like a kid in a candy store!!

P.S.  I couldn't get myself to get a "breast milk" flavored lolly.  That was just too...ew, but of course that didn't stop me from taking a picture of it!


Sunday, May 29, 2016

Good enough to eat, but not for me...


I love, love making things with fruit, but I won't eat them.  It's odd because I have an idea what would be a good fruit combination, but I don't like fruit.  Most fruit I've never even eaten.  Crazy, I know!

Even though fruit scares me, I find it can be very beautiful.  Nature is so strange, but yet so alluring!

Dale and I are going to our friend's, John and Val, for a BBQ today.  Of course I wanted to bring everything under the sun, but we limited ourselves to two things.  Dale will be making a cucumber salad, and I made this tart.  

German Fruit Tart

(serves about 12)

Shortcake:
3 eggs
75 grams (3/8 cup) sugar
75 grams (1/3 cup) soft butter
1 packet German vanilla sugar
1 pinch salt
150 grams (1 1/4 cup) pastry flour (half all purpose flour and half cake flour)
1 teaspoon baking powder  

Generously grease and flour a German flan pan.  I recommend that you do this first and have it set aside.  Preheat your oven to 400 degrees F. 

Beat eggs in a large bowl, using a hand mixer at highest setting; add sugars, salt, and soft butter, and continue beating at high speed until frothy.  Sift flour and baking powder together and add and beat until well blended.  Pour batter into the prepared pan and smooth.  This will be fairly thick, so be sure you carefully push the batter into the "moat" of the pan.  This will create the depression in the inverted finished cake.  Bake for about 12-15 minutes or until golden brown and an inserted toothpick comes out clean.  Let the cake cool completely on a wire rack before turning out and assembling.

You can find these specialized ingredients and pan online (Google German Flan Pan) or in German grocery stores, and sometimes the pans show up in thrift stores.  We just take it for granted that we've always had one.  Our pan was from Dale's German mother,  Jenny.  My Grandma Bahls also had one, and made wonderful cakes when we were growing up.  

Tart Filling:
Assorted fruit, sliced; anything that's in season is best, but you can also used canned (I used some canned Mandarin orange slices in the tart pictured)
1 packet Clear Glaze; follow the instructions on the package

Arrange your fruit in a pleasing pattern.  I love this part!  I'm so anal when it comes to getting it just right.

Spoon the hot glaze over top to set the fruit.  Let this cool before serving.

Take a pint of cold heavy cream and add two packets of "Whip It" stabilizer (if you have it), and packet of vanilla sugar.  If not, you can just whip the cream with a little sugar and a few drops of vanilla and serve over the cut slices of the tart.

Enjoy!  I'll just enjoy the pleasure of making something beautiful and delicious for others!

Friday, May 13, 2016

Certified Tested & Perfected: Soft Pretzels v2.0 (with BONUS Sourdough Starter Recipe!)

Yum!  Who doesn't like a good soft pretzel?  Well, I'm sure there may be a few people, but I'm sure they are certified crazy!

I've made these many times before using some discarded sourdough starter, but this is the first time I've boiled them in a baking soda solution.  I'd have to say the results are stunning.  I would classify this recipe as tested and perfected!  These do not have a very long shelf life in our house, and you will find them as irresistible as we do.  Or maybe not.  We are a couple of pigs in our home.  Pigs for fresh baked soft pretzels!

Sourdough Discard Soft Pretzels

Makes 12 Pretzels

Dough:
3/4 cup lukewarm water
1 cup unfed healthy sourdough starter, straight from the refrigerator (or use fed starter if you like): see sourdough starter recipe below
3 cups unbleached all-purpose flour
1/4 cup nonfat dry milk (I use Bob's Redmill brand, but you can use any)
2 tablespoons (1/2 ounce) non-diastatic malt powder (I use malted milk powder)
1 tablespoon vegetable oil
1 1/2 teaspoons Kosher salt
2 teaspoons instant yeast

coarse Kosher salt; pretzel salt if you can get it

Baking Soda Solution:
10 cups water
2/3 cup baking soda


Mix all ingredients (to exclude the baking soda solution, of course) into a mass of dough.  You will now need to knead the dough – either by hand or a mixer fitted with a dough hook, until smooth.  It should be slightly sticky but not wet.  If it seems dry, knead in an additional tablespoon or two of water.  Shape the dough into a ball, and place it in a lightly greased bowl. Cover the bowl, and let the dough rest for 45 minutes.  The dough will not rise a lot.

Preheat your oven to 350°F, and then put 10 cups water in a large pot and add baking soda.  Bring to a boil while you are rolling shaping the pretzels.

Turn the dough out onto a lightly greased work surface; a silicone rolling mat works well. Fold the dough over a few times with your hands to gently deflate it, then shape it into a rough rectangle.  I love the process of shaping the dough.  It's so relaxing for me.

Score it once lengthwise, and five times crosswise, to make 12 pieces and gently cut the dough into pieces; you don’t want to cut into the silicone mat, if you’re using one.  Or you can eyeball the dough and cut in half, then those two pieces in half, and then each piece into thirds.

Cover the dough you aren't using with plastic wrap, so it doesn’t dry out as you’re working with the individual pieces.  No need to cover if you are seasoned pretzel-shaper like myself!  Haha...yeah, that's what I'm going to keep thinking.

Roll each piece of dough into an 18″ rope (approximate is fine, no rulers needed). Keep the finished ropes covered if you are just learning, so they don’t dry out.

You may find it easiest to roll some of the ropes partway. That way, each has a chance to rest (and the gluten to relax) as you’re working on the other ropes.

Shape into pretzel shapes by making a loop, twist twice, tuck ends behind bottom of pretzel, and lightly press down from the front on top of the ends.  Don't worry about leaving marks since they will boil/bake out.  Just be careful not to get too pushy though and press the dough until it's flat.  Flat pretzels are a no-no here.  Place the shaped pretzels onto parchment-lined or lightly greased (again, I use my silicone mats) baking sheet and get ready to boil them.  Don't be afraid!  I've done this many times and I've never drowned one yet.

The baking soda solution should be boiling.  Drop one pretzel in and boil for 30 seconds.  Take out with a slotted spoon and place back to its place on the baking sheet.  At this time, sprinkle with coarse salt and repeat until one pan is done.  You can put them into the oven and start timer now.  Repeat the same process on other pan and put in the oven and start another timer or do the math.

Bake the pretzels for 25 to 30 minutes, until they’re dark brown.  
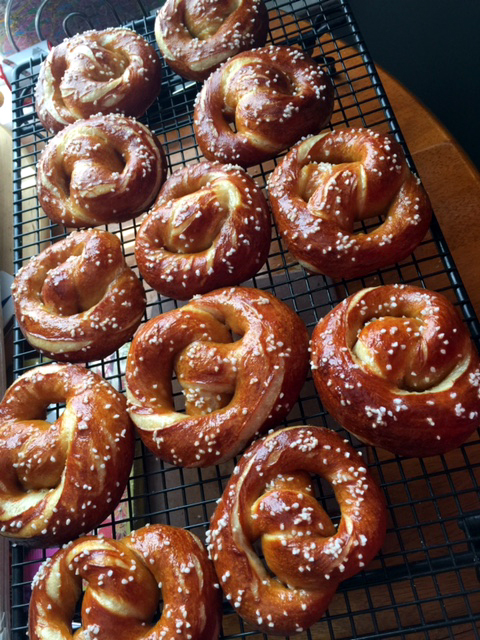
Remove them from the oven, brush with melted butter, and cool slightly before serving.  They get really shiny and quite lovely.  You almost hate to eat them...almost.
Oh-Em-Gee!  These are so wonderful to eat!  Really.  They are chewy and crunchy and soft and salty and so, so delicious.  You will have a hard time just eating one.

I have tested freezing the shaped unboiled/unbaked pretzel dough, and then taking them out for about an hour before I want to bake them.  This will give you time to get the oven going and the baking soda solution boiling, and your appetite going...

Wild Sourdough Starter 

Makes about 1 cup

This will be more prolific then a couple of bunnies, that is, if you take care of it.  You just have to remember that your new starter will become a living thing, and like all living things, it needs to eat.  You will be it's caretaker since it can't reach out and feed its self, but since you will be feeding it, you will have to throw some of it away.  You don't want a garbage can full of it at the end do you?  Once you establish a healthy starter, you can take the discard from your feedings to make the lovely pretzels above.

This will take time!  Just like when you raise and nurture any living thing. Pulled the following from the King Arthur Flour website.  I say, work smarter, not harder.

Initial Starter:
1 cup whole rye (pumpernickel) or whole wheat flour
1/2 cup cool water

Starter Food:
a scant 1 cup unbleached all-purpose flour
1/2 cup cool water (if your house is warm), or lukewarm water (if your house is cool)

Day 1: Combine the pumpernickel or whole wheat flour with the cool water in a non-reactive container. Glass, crockery, stainless steel, or food-grade plastic all work fine for this.  Stir everything together thoroughly; make sure there's no dry flour anywhere. Cover the container loosely and let the mixture sit at warm room temperature (about 70°F) for 24 hours. See "tips," below, for advice about growing starters in a cold house. 

Day 2: You may see no activity at all in the first 24 hours, or you may see a bit of growth or bubbling. Either way, discard half the starter (4 ounces, about 1/2 cup), and add to the remainder a scant 1 cup King Arthur Unbleached All-Purpose Flour, and 1/2 cup cool water (if your house is warm); or lukewarm water (if it's cold).  Mix well, cover, and let the mixture rest at room temperature for 24 hours. 

Day 3: By the third day, you'll likely see some activity — bubbling; a fresh, fruity aroma, and some evidence of expansion. It's now time to begin two feedings daily, as evenly spaced as your schedule allows. For each feeding, weigh out 4 ounces starter; this will be a generous 1/2 cup, once it's thoroughly stirred down. Discard any remaining starter.  Add a scant 1 cup (4 ounces) King Arthur Unbleached All-Purpose Flour, and 1/2 cup water to the 4 ounces starter. Mix the starter, flour, and water, cover, and let the mixture rest at room temperature for approximately 12 hours before repeating. 

Day 4: Weigh out 4 ounces starter, and discard any remaining starter. Add a scant 1 cup (4 ounces) King Arthur Unbleached All-Purpose Flour, and 1/2 cup water to the 4 ounces starter. Mix the starter, flour, and water, cover, and let the mixture rest at room temperature for approximately 12 hours before repeating.

Day 5: Weigh out 4 ounces starter, and discard any remaining starter. Add a scant 1 cup (4 ounces) King Arthur Unbleached All-Purpose Flour, and 1/2 cup water to the 4 ounces starter. Mix the starter, flour, and water, cover, and let the mixture rest at room temperature for approximately 12 hours before repeating.

By the end of day #5, the starter should have at least doubled in volume. You'll see lots of bubbles; there may be some little "rivulets" on the surface, full of finer bubbles. Also, the starter should have a tangy aroma — pleasingly acidic, but not overpowering. If your starter hasn't risen much and isn't showing lots of bubbles, repeat discarding and feeding every 12 hours on day 6, and day 7, if necessary — as long as it takes to create a vigorous (risen, bubbly) starter. Note: see "tips," below. 

Once the starter is ready, give it one last feeding. Discard all but 4 ounces (a generous 1/2 cup). Feed as usual. Let the starter rest at room temperature for 6 to 8 hours; it should be active, with bubbles breaking the surface. Hate discarding so much starter? See "tips," below. 

Remove however much starter you need for your recipe (no more than 8 ounces, about 1 cup); and transfer the remaining 4 ounces of starter to its permanent home: a crock, jar, or whatever you'd like to store it in long-term. Store this starter in the refrigerator, and feed it regularly; we recommend feeding it with a scant 1 cup flour and 1/2 cup water once a week.

Wednesday, April 27, 2016

Made Lots ~ Posted Not

Look at what I've made since I've been home back on Cache La Poudre Street, and I didn't even write about it.  Tsk, tsk.


Baked Soft Pretzels made from discarded sourdough starter.  Waste never look so good!
Made these tender and fluffy popovers for Easter breakfast.  Dale had never had them before and he proved that it didn't make a difference.  He woofed half of these puppies down.  
It wouldn't be Easter without Deviled Eggs!  I make mine very simple like both of my grandmothers did.  Simple yet delicious.
Super sharp white cheddar mac & cheese.  Yes, those are Ritz crackers on top.  I'm fancy like that.
Brined a plump chicken and roasted it to perfection.
A tiny loaf of Sourdough made from the extras from my Pullman loaf.
This is the small Pullman loaf.  Look at those perfect sandwich slices of bread. 
This is the large Pullman loaf.  I have to cut it in half and freeze it.  It freezes beautifully by the way.
Good old classic German Farmer's Bread.  This is the whopping full loaf. 

My new pans make wonderful mini Frienship loaves to give to friends and family.  Or eat a whole loaf by myself.  Ahem.
This rich and delicious fish soup with assorted fruits from the sea.  That's Monk Fish upfront and centered.  It's called the "Poor Man's Lobster" and I can see why.  The texture was so good!
I helped in the sushi sweatshop at my sister, Dori's house.  Impressive isn't it?


Try My Lovely Buns?


Today's Note:  It's been such a long time since I've posted on my beloved blog.  I've been cooking and baking as much as I can, but I haven't been bragging about it.  Gasp!  I did find this post that I was working on last year while we were still in Ruston, Washington.  I thought I should finish what I started.  Plus I got a kick out of the title...

I found this recipe on one of my new favorite sites, ChefSteps.  These are the best hamburger buns you'll ever have and they are surprisingly easy.  With a little effort, and some extra time on your hands, you can whip up these beautifully soft buns. They are very much like store bought, but better tasting and sans those ingredients that one can never pronounce.

The recipe I'm going to post is not longer available on ChefSteps and I'm glad that I archived it in my "Recipe Box" app on my Apple devices.  The folks at ChefSteps love to weigh their ingredients, so yes, all of the measurements are in grams.  Someday, I may convert it to Imperial volume measurement. Someday.  But I say for the time being, you should invest in a gram/ounce kitchen scale.  I've had one for ages and I don't know what I would do without it!

Brioche Burger Buns

(Makes a lovely dozen)

645 g bread flour
360 g eggs, about 8
80 g sugar
200 g whole milk
45 g yeast
200 g butter
50 g diastatic malt powder, ordered mine from amazon.com
22 g salt

Place milk, egg, sugar, and yeast in a mixing bowl.  Use the paddle attachment on your mixer and mix on medium low speed for about 5 minutes, or until yeast is well dispersed.  Yes, this recipe also assumes you have a stand mixer with a paddle attachment.  Again, I've had a KitchenAid for ages and I don't know what I would do without it.  You could use a wooden spoon or your hands to mix, and think of the workout your forearms are going to get!  Ahem, back to the recipe...

While continuing to mix, add the salt.  In a separate bowl, combine the diastatic malt powder and flour.  Gradually add this mixture by large spoonfuls into the mixing bowl while the mixer is running and until fully incorporated.

Switch to the dough hook.  Mix until a ball forms and pulls cleanly away from the sides of the bowl.  This can take up to 25 minutes or more.  Then, add the butter slowly unit it's fully incorporated and the dough develops a nice sheen, and pulls cleanly from the sides of the bowl.

Place dough in a greased bowl and cover with plastic wrap.  Rest in the fridge for 2 hours or until very cold.

Meanwhile, you can make foil collars for each bun, OR you could try to use this nifty "muffin top" pan.  I bought two of these at a discount store just for these buns, but I have yet to use them. 

If you make the collars, fold several layers of foil into an approximately 14 inch long and  3/4 inch wide strip and staple into a round ring. Trim any excess foil.  Make as many as you need and lay collars on a parchment or Silpat lined baking sheet and spray the insides of the collars with non-stick spray.

Once the dough is cold, portion to 80 g pieces, and form spheres by rolling the dough between your pinky and your thumb, with the heel of your other hand.  Place the dough ball into the center of a foil collar.  Repeat until all of the dough has been used.  While you are working, you can keep the unused dough in the fridge to keep cold.

Lightly spray dough balls with non-stick spray and cover with a sheet of plastic wrap (or cling film if you're British - love that!).  Use a rounded bottom bowl to flatten each dough ball to spread out into the ring.  Do this for all of the buns and carefully lift the cling...er, plastic wrap off.  Spray the underside of the plastic wrap with more non-stick spray and lightly cover the buns to let them proof until doubled in size or about 2 hours in a warm place.  Be careful to not let them over proof.  The finished buns in the picture fell a bit, but Washington was not a good place to bake bread in comparison to Colorado.  I love making bread here!

While your buns are proofing, preheat your oven to 350 degrees F and prepare an egg wash.

Carefully peel off the plastic wrap and carefully brush the proofed buns with egg wash and sprinkle with sesame seeds or anything else you would like to use.  Re-hydrated dehydrated onions would be delicious!  Or you can just leave the plain egg wash.

Bake buns for 15 minutes or until golden brown and the core temperature reaches about 200 degrees F inside.  Take out and cool.  Believe it or not, but for best results, place in a zip-top bag for two days before using.  This will allow the crust to reabsorb moisture from the crumb, giving the whole bun a softer texture.
Perfect for your juicy burgers!


Look at this great texture!


I will have to remake this recipe here in Colorado and use my "muffin top" pans.  I'll be sure to post the final results when I do. 

This recipe is a bit advanced, but with a little confidence and a good mixer, you can make these lovely buns!

Thursday, January 28, 2016

Krispy Kreme Bread Pudding


So, I've been shacking up with my good friend, Roni (aka AJ), and I have been having a load of fun cooking and what-not while she is toiling away at work!  Sorry!!

The other day, AJ was giving me an lesson in economics.  A dozen of lovely assorted doughnuts from Krispy Kreme are priced at a whopping $11.39.  Meanwhile (here's where the economics peeks in), if you add another dozen the price is only $14.99!  That's a $3.60 difference.  What a deal, but who can eat two dozen doughnut?

We got a dozen of the traditional raised glazed and the other dozen of the assorted.  After a few days of gorging ourselves, sadly we had 8 glazed left and they were indeed stale.  Boo!

I hate throwing away food and am a bit old fashioned and nostalgic, and I gave it a thought of what I could do with these oldies but goodies.

Bread pudding!!

I searched and searched on Google surprised to find many fine (and not so fine) recipes.  I found a simple but delicious way to not have to throw away that $3.60 dozen!

Well, we did eat 4 of these while there were still fresh, so I altered the recipe, but below is the full size and I added chopped pecans.

Krispy Kreme Bread Pudding

Serves 8 (or less if you are feeling piggish!)

Custard:
1 dozen stale Krispy Kreme glazed doughnuts (any stale raised glazed will do though!)
3 eggs
1 cup whole milk
1 1/4 cups heavy cream
1/2 cup brown sugar, packed
1/2 tsp. salt
1/2 tsp. vanilla extract
pinch of ground nutmeg
2.25 oz bag of chopped (or bits) pecans, optional

Chocolate Ganache Sauce:
1 cup extra dark chocolate chips (can use semi-sweet)
2/3 cup heavy cream

Cut each doughnut into 5 or 6 pieces and place in a greased 9"x13" baking dish or cake pan.  Sprinkle most of the bag of nuts on top of the pieces and into the crevasses.  In a medium bowl, whisk together the remaining custard ingredients until well mixed.  Pour over doughnuts and press down gently with a fork to allow pieces to absorb the custard.  Let sit while the you preheat your oven to 350 degrees F.

Bake for 45 minutes or until a knife comes out clean.  Sit aside to cool slightly and make your sauce.

Place chocolate chips in a heat proof bowl and microwave cream for approximately 1 1/3 minutes or until boiling.  Be careful not to let it boil over!  Pour hot cream over chocolate and let sit for about half a minute and stir until smooth.

Cut up your Krispy Kreme Bread Pudding into squares and serve with sauce drizzled over top.  This recipe will make you want to get an extra dozen the next time you make your doughnut run!

This is a nice comforting dessert and surprisingly not too sweet!