Monday, November 27, 2006

Asparagus Atonement


I must confess that I harbored ill feelings towards asparagus for a long time. I grew up on a farm, and this grassy veggie was plentiful, but I could not stomach eating it. My mother used to chop it up, boil it to near mush, and cream it. Ugh. I'm sorry, but something so fresh and lively as asparagus needs to be complimented, not smothered.

So, many years later I took the leap to try it again when my sister had whipped it up one night. She barely blanched the bunch in boiling water and then threw it in a frying pan with some butter and garlic. We then threw on some salt and pepper and I tell you what, I fell in love.

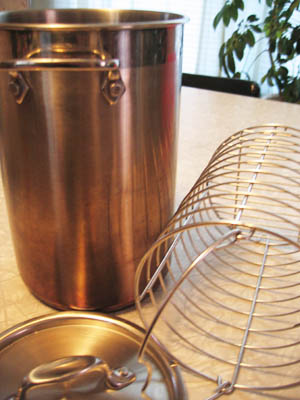
Now I make asparagus all of the time, and here is my favorite way of eating it. Everyone who knows me knows that I have this passion for kitchen gadgets and things. Well, I've fallen so hard for asparagus that I purchased a special pot to steam it in. It's tall and very thin with a wire basket that fits inside (yes, the sweet stems stand up while steaming, tips upward please) and then you cover it with a lid.

It's very simple to use and putting in only a few inches of water on the bottom and bringing it to a boil seems to do the trick nicely. The veggie is nice and evenly crisp from bottom to tip, and never overdone. Oh, you can use the pot for other things too when you're not cooking up asparagus. I boil eggs in mine, and the nice basket helps me lift them out and cool them down under running cold water.

Asparagus & Garlic
Serves 1-3 people

1 bunch of fresh asparagus (I like the thinner stalks, but you can get whatever you'd like)
1 T extra virgin olive oil
4 cloves garlic, crushed and coarsly chopped
kosher salt
fresh ground black pepper
a healthy sized lemon wedge (about a quarter)

Prepare the basket with the cleaned asparagus. I don't cut off the ends, I just give it a gentle bend, and wherever it snaps off is suppose to be more woody and should be discarded. You can just trip off the bottoms with a knife if you don't mind the tougher ends. Do not put the basket into the pot with the water until it comes to a boil. Once it does, slip the basket in and cover with the lid. Now is the time to prepare the ice water bath. Just fill up a container with cold water and throw in a couple of trays of ice.

Steam the asparagus for approximately 3-4 minutes depending on how crunchy you like them. I just pull the lid off, reach in and grab one to sample. At this time they are a vibrant green, and I like to make them just slightly underdone as I reheat them anyway. Pull out the basket and pour the steamy stems into the ice bath. Move them around and they should stop cooking almost immediately. Let them sit in the water.

In a heavy frying pan, heat up the olive oil over low heat, add the garlic and saute till fragrant but the garlic is not brown. Turn the heat to high then grab the asparagus by bunches (you don't have to drain them too carefully as the moisture helps in the saute) and throw them in the pan with the garlic. Sizzle! Move the asparagus around to coat evenly and saute for approximately 2 minutes or heated through. Sprinkle with some kosher salt and a generous grind of coarse black pepper.

Plate on a platter and spoon over any garlic and oil that may be left in the pan. Gotta get all the good stuff! Squeeze the lemon wedge over the top and garnish if you'd like with lemon slices. Serve immediately although this is just as good at room temperature.

I am so glad that I put my fears aside and enjoy this simple but elegant dish. Well, I must admit that I prefer to eat asparagus with my fingers. Happy eating!

Sunday, November 26, 2006

Sweet Santas


Aren't these sweet in more ways than one? They are so...well, adorable. They are very simple to make, and I saw the idea in a little cookie book that I picked up while waiting in the check-out line at the grocery store. It was chock full of old-fashioned (and new-fashioned) treats for the Holidays.


Sweet Santas
Yields 32 cute cookies.

3 blocks of white chocolate bark (you know, it comes in those "ice cube-like" trays)
1 package (1 lb) Nutter Butter sandwich cookies
red colored sugar
32 vanilla or white chocolate chips
64 miniature semisweet chocolate chips
32 red hot candies

Follow the white chocolate bark melting method noted on November 22's post of "Bacon 'n Eggs". Melt in a small, deep type bowl. It will be easier to dip the cookies.

Dip one end of each cookie into the melted white chocolate and sprinkle the top part of the hat with the red colored sugar (be sure to keep some white for Santa's trim). Place a white chocolate chip on the hat for the pom-pom. Lay out on waxed paper or a silpat mat, and let the chocolate set. Work each one till you get all the hats finished.

Now for the whiskers. Dip the beard end of the cookie with the first cookie you started with. Set down to set. Take a table knife and dip the tip in the now slightly cooled white chocolate. You will get a "V-like" drip, take this and dollop the eyes and nose and place two mini chips for eyes, and the red hot for nose. Work each cookie one at a time.

Before you know it, you'll have rows upon rows of happy sweet Santas, and plenty to put out on Christmas Eve night for the Big Guy In Red.


The peanut butter flavor and the white chocolate bark is a nice combination, and I'm certain that they will be gobbled up in no time. Stop by again for more treats for the Holidays.

Hearty Beef & Barley For One


Remember that beefy stock I made last week in my pressure cooker? Well, along with consuming half of it making quick single soups, I froze the other half in my silicone mini muffin molds and stored them in a baggie in the freezer to use at my disposal. I also picked the meat off of the broth bones and froze. There is not a lot of flavor left in these very tender morsels, but if you chop them up and re-add them to this dish, it's very tasty and adds nice texture and protein.

Since it's getting colder now and getting into wintertime, I had a hankering for something hearty. I concocted this tasty late lunch for myself while I was watching one of my favorite cooking guys, Alton Brown.

Although I could have cut the cooking time down to nearly nothing in my pressure cooker, I opted for the range in a small and heavy sauce pan with a tight fitting lid. This way I could season and tweak to my liking. Because being at over 6,000 feet above sea level it took nearly an hour to simmer this up, but it was well worth the wait.

Diane's Hearty Beef & Barley
This is a hearty single serving, or two smaller, but still satisfying servings.

1 1/2 cups beefy broth (see November 20th's post "Under Pressure")
1/2 cup organic dry pearl barley
1/4 dry onion flakes (better than fresh for this dish because the flavor is more concentrated)
1/2 t dried thyme
1 t crushed fennel seed (you can cut this back to 1/2 t, I love fennel)
1 t Mrs. Dash garlic and herb seasoning
1 large button mushroom, coarsely chopped (more if you'd like)
a few sprigs of fresh parsley, finely chopped
chopped cooked beef (about 2 oz)
kosher salt
fresh ground black pepper
boiling water (used to add while the barley absorbs)

In my case I melted the stock cubes over high heat and brought to a boil, then I added all of the dry ingredients, chopped mushrooms and beef and continued to cook for a minute or two. I added the pearl barley and brought the flame down to low, put the lid on and simmered for 20 minutes.

After the first 20 minutes was up, I added about 1/2 cup of boiling water, stirred, and continued to cook for another 20 minutes letting the barley soften. I then checked it and decided to add another 1/2 cup boiling water, and cooked for another 15 minutes or so. Keeping the lid off at the end to let the "broth" reduce.

Even though I kept adding water throughout the cooking period, it didn't hinder the richness of the beef broth. On the contrary, cooking this way helped me control the consistency of the barley to slightly chewy, and the dried seasonings were very flavorful. Season to taste with salt and pepper.

Now...bring on snow!