Monday, December 11, 2006

Passion For Pomegranates


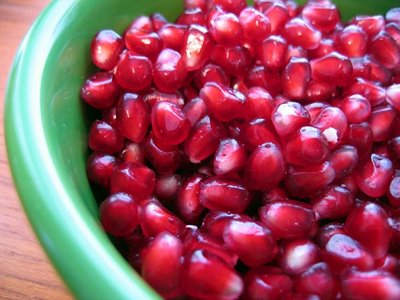
I absolutely love pomegranates. I think that I am the only person that I know that actually buys these jeweled gems just because I think they are fun to eat. Not only are they so tangy and good for you, I find them really fun to harvest the seeds.

It's like cracking crabs, or shelling nuts, to me it's worth the wait and effort. Today I ran this bowl of seeds through my Bullet juicer. Which by the way is the first time I've ever used the juicer attachment. I will have to do an ode to my Bullet sometime soon.

After about 20 minutes of seeding and peeling, and hand picking each morsel, I threw them all into the mechanical macerator and extracted...oh about 1/4 cup juice. Not a lot of payoff for my efforts? I beg to differ.

Sunday, December 10, 2006

Season's Eatings


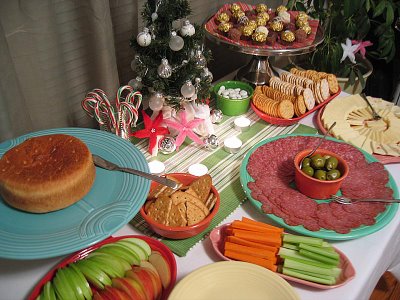
The other night I had my first dinner party since I'd been back from the sand box. It went well. I had nine diners (including myself) and a little toddler, and there was plenty to eat. The menu comprised of:

Appetizers:

Various cheeses and crackers
Warm brie en'croute with apples
Various hard Italian salamis
Various candies and chocolates
Garlic stuffed green olives
Bread and dipping olive oil with various spices
Carrot and celery sticks
Egg Nog
Various wines (PLENTY of wine)

Main Course:

Stuffed pork loins
Roasted new potatoes with onions
Gravy
Deviled chicken
Broccoli with garlic and olive oil
Homemade four cheese ravioli with marinara
Various wines (More and MORE)

Dessert:

Tiramisu
(see November 16 post "The Best Tiramisu" for recipe)
French-pressed fresh ground coffee

I think everyone felt well sated, and after several ruthless (and drunken) games of Cranium we called it a night. The next morning the cleanup was minimal and fairly painless (only seven loads of dishes in the sink), and I had a good warm feeling that this holiday was celebrated and acknowledged as it should be. There really is no place like home.

Monday, November 27, 2006

Asparagus Atonement


I must confess that I harbored ill feelings towards asparagus for a long time. I grew up on a farm, and this grassy veggie was plentiful, but I could not stomach eating it. My mother used to chop it up, boil it to near mush, and cream it. Ugh. I'm sorry, but something so fresh and lively as asparagus needs to be complimented, not smothered.

So, many years later I took the leap to try it again when my sister had whipped it up one night. She barely blanched the bunch in boiling water and then threw it in a frying pan with some butter and garlic. We then threw on some salt and pepper and I tell you what, I fell in love.

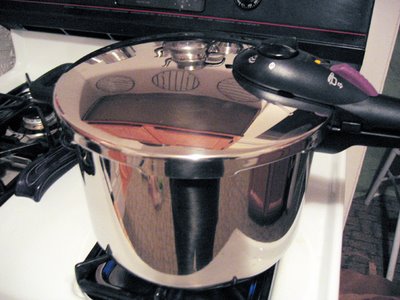
Now I make asparagus all of the time, and here is my favorite way of eating it. Everyone who knows me knows that I have this passion for kitchen gadgets and things. Well, I've fallen so hard for asparagus that I purchased a special pot to steam it in. It's tall and very thin with a wire basket that fits inside (yes, the sweet stems stand up while steaming, tips upward please) and then you cover it with a lid.

It's very simple to use and putting in only a few inches of water on the bottom and bringing it to a boil seems to do the trick nicely. The veggie is nice and evenly crisp from bottom to tip, and never overdone. Oh, you can use the pot for other things too when you're not cooking up asparagus. I boil eggs in mine, and the nice basket helps me lift them out and cool them down under running cold water.

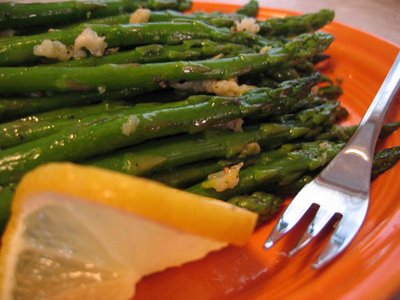
Asparagus & Garlic
Serves 1-3 people

1 bunch of fresh asparagus (I like the thinner stalks, but you can get whatever you'd like)
1 T extra virgin olive oil
4 cloves garlic, crushed and coarsly chopped
kosher salt
fresh ground black pepper
a healthy sized lemon wedge (about a quarter)

Prepare the basket with the cleaned asparagus. I don't cut off the ends, I just give it a gentle bend, and wherever it snaps off is suppose to be more woody and should be discarded. You can just trip off the bottoms with a knife if you don't mind the tougher ends. Do not put the basket into the pot with the water until it comes to a boil. Once it does, slip the basket in and cover with the lid. Now is the time to prepare the ice water bath. Just fill up a container with cold water and throw in a couple of trays of ice.

Steam the asparagus for approximately 3-4 minutes depending on how crunchy you like them. I just pull the lid off, reach in and grab one to sample. At this time they are a vibrant green, and I like to make them just slightly underdone as I reheat them anyway. Pull out the basket and pour the steamy stems into the ice bath. Move them around and they should stop cooking almost immediately. Let them sit in the water.

In a heavy frying pan, heat up the olive oil over low heat, add the garlic and saute till fragrant but the garlic is not brown. Turn the heat to high then grab the asparagus by bunches (you don't have to drain them too carefully as the moisture helps in the saute) and throw them in the pan with the garlic. Sizzle! Move the asparagus around to coat evenly and saute for approximately 2 minutes or heated through. Sprinkle with some kosher salt and a generous grind of coarse black pepper.

Plate on a platter and spoon over any garlic and oil that may be left in the pan. Gotta get all the good stuff! Squeeze the lemon wedge over the top and garnish if you'd like with lemon slices. Serve immediately although this is just as good at room temperature.

I am so glad that I put my fears aside and enjoy this simple but elegant dish. Well, I must admit that I prefer to eat asparagus with my fingers. Happy eating!
Sunday, November 26, 2006

Sweet Santas


Aren't these sweet in more ways than one? They are so...well, adorable. They are very simple to make, and I saw the idea in a little cookie book that I picked up while waiting in the check-out line at the grocery store. It was chock full of old-fashioned (and new-fashioned) treats for the Holidays.


Sweet Santas
Yields 32 cute cookies.

3 blocks of white chocolate bark (you know, it comes in those "ice cube-like" trays)
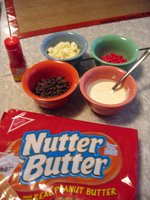
1 package (1 lb) Nutter Butter sandwich cookies
red colored sugar
32 vanilla or white chocolate chips
64 miniature semisweet chocolate chips
32 red hot candies

Follow the white chocolate bark melting method noted on November 22's post of "Bacon 'n Eggs". Melt in a small, deep type bowl. It will be easier to dip the cookies.

Dip one end of each cookie into the melted white chocolate and sprinkle the top part of the hat with the red colored sugar (be sure to keep some white for Santa's trim). Place a white chocolate chip on the hat for the pom-pom. Lay out on waxed paper or a silpat mat, and let the chocolate set. Work each one till you get all the hats finished.

Now for the whiskers. Dip the beard end of the cookie with the first cookie you started with. Set down to set. Take a table knife and dip the tip in the now slightly cooled white chocolate. You will get a "V-like" drip, take this and dollop the eyes and nose and place two mini chips for eyes, and the red hot for nose. Work each cookie one at a time.

Before you know it, you'll have rows upon rows of happy sweet Santas, and plenty to put out on Christmas Eve night for the Big Guy In Red.


The peanut butter flavor and the white chocolate bark is a nice combination, and I'm certain that they will be gobbled up in no time. Stop by again for more treats for the Holidays.

Hearty Beef & Barley For One


Remember that beefy stock I made last week in my pressure cooker? Well, along with consuming half of it making quick single soups, I froze the other half in my silicone mini muffin molds and stored them in a baggie in the freezer to use at my disposal. I also picked the meat off of the broth bones and froze. There is not a lot of flavor left in these very tender morsels, but if you chop them up and re-add them to this dish, it's very tasty and adds nice texture and protein.

Since it's getting colder now and getting into wintertime, I had a hankering for something hearty. I concocted this tasty late lunch for myself while I was watching one of my favorite cooking guys, Alton Brown.

Although I could have cut the cooking time down to nearly nothing in my pressure cooker, I opted for the range in a small and heavy sauce pan with a tight fitting lid. This way I could season and tweak to my liking. Because being at over 6,000 feet above sea level it took nearly an hour to simmer this up, but it was well worth the wait.

Diane's Hearty Beef & Barley
This is a hearty single serving, or two smaller, but still satisfying servings.

1 1/2 cups beefy broth (see November 20th's post "Under Pressure")
1/2 cup organic dry pearl barley
1/4 dry onion flakes (better than fresh for this dish because the flavor is more concentrated)
1/2 t dried thyme
1 t crushed fennel seed (you can cut this back to 1/2 t, I love fennel)
1 t Mrs. Dash garlic and herb seasoning
1 large button mushroom, coarsely chopped (more if you'd like)
a few sprigs of fresh parsley, finely chopped
chopped cooked beef (about 2 oz)
kosher salt
fresh ground black pepper
boiling water (used to add while the barley absorbs)

In my case I melted the stock cubes over high heat and brought to a boil, then I added all of the dry ingredients, chopped mushrooms and beef and continued to cook for a minute or two. I added the pearl barley and brought the flame down to low, put the lid on and simmered for 20 minutes.

After the first 20 minutes was up, I added about 1/2 cup of boiling water, stirred, and continued to cook for another 20 minutes letting the barley soften. I then checked it and decided to add another 1/2 cup boiling water, and cooked for another 15 minutes or so. Keeping the lid off at the end to let the "broth" reduce.

Even though I kept adding water throughout the cooking period, it didn't hinder the richness of the beef broth. On the contrary, cooking this way helped me control the consistency of the barley to slightly chewy, and the dried seasonings were very flavorful. Season to taste with salt and pepper.

Now...bring on snow!

Wednesday, November 22, 2006

Bacon 'n Eggs


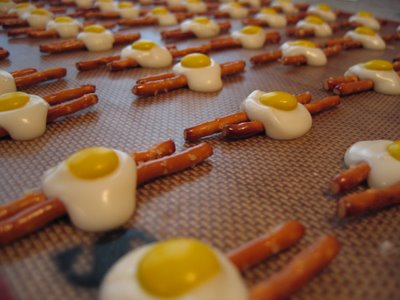
This is my signature sweet for the Holidays. I whipped up a batch or two for Thanksgiving, and will make plenty more for Christmas. It's so easy and so CUTE!

Bacon 'n Eggs


1 package white chocolate bark
yellow M&Ms (get the biggest bag you can and only sort out the yellow ones, save the others for munching or cookies)
pretzel sticks

Layout two pretzel sticks side-by-side (kind of off set them as that makes them more quirky and cute) in rows on waxed paper or a silpat mat. Chop up white chocolate bark and melt in microwave (use a good solid stoneware bowl as it will retain the heat longer and keep the chocolate pliable). Put a dollop of melted chocolate roughly in the middle; do only 6 or six at a time. You don't have to be perfect since eggs aren't perfect. Place a yellow M&M on top, hence this is the yolk. Let set and package in airtight container. Be careful not to break the pretzels.

I like to pack them into seasonal cellophane baggies tied with curly ribbon. I know I'm such a sap, but hey...it's the holidays!

Monday, November 20, 2006

Under Pressure


I've been on the Good Eats kick with Alton Brown, and he had a show where he made beef broth in a fraction of the time it would take to make the conventional way.

I've just followed the below recipe (substituted oxtail with beef back bones as there was not oxtail), cooked under pressure for 60 minutes (he calls for 50 minutes, but A-HA, he's not at nearly 6,000 feet above sea level either!) and I'm letting it cool down naturally. The broth will continue to cook and therefor making it more rich and savory. YUM-O!

I was very skeptical about pressure cooking. Growing up on a farm I had my share of meat-and-potato meals. Well, my parents had a pressure cooker which they would boil our potatoes in. That thing scared the bejeezus out of me! It rattled, it hissed, it was noisy, and I was always terrified when they released the steam and forced it open. Plus, I never realized why they used it (knowing now that pressure cooking cuts the time down to nearly a third of the normal cooking time).

After Alton gave me the strength and confidence to go out and purchase one of these devices, I was pleasantly surprised. Again, my broth has been pressure cooking for an hour, and I've turned off the heat. I barely heard the thing! I think I'm going to go and see what this quick release steam thing is all about now! I guess I'll sacrifice a bit more richer and savorier broth for the sake of workin' the new gadget!

AB's Beefy Broth

Vegetable oil
Salt and pepper
3 pounds combined beef shank and oxtail pieces
2 onions, quartered
2 ribs celery, halved
2 carrots, halved
3 cloves garlic
1 bunch parsley
1 teaspoon black peppercorns
2 quarts water

Place pressure cooker over high heat. Oil and salt the oxtail and shank pieces then sear in batches. Add remaining ingredients and cover with water, being careful not to fill above the cooker's maximum fill" line. (If your pressure cooker does not have a water line, fill the pot 2/3 full). Bring to a boil and skim off any foam that gathers at the surface. Cover and lock lid. Once pressure builds up inside the cooker, reduce the heat so that you barely hear hissing from the pot. Cook for 50 minutes.

Release pressure using your cookers release device (read that manual) or cool the cooker by running cold water over the lid for 5 minutes. Carefully opening the lid and strain squeezing the solids before feeding to the compost pile, or the dogs. Strain through a fine sieve or several layers of cheesecloth. Season and serve or use as a base for other soup recipes.

Super Salad


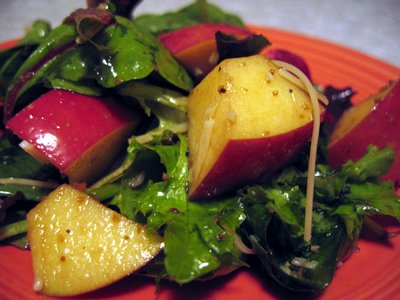
The other night I had made a great lasagna dinner (sadly I did not archive that meal) and I shook up my own dressing. Well, tonight while working on my latest adventure I threw together a quick salad for munching while I waited for my creation to finish. Here's the quick fixing for the dressing and it's even better as it sits in your fridge!

Balsamic and Olive Oil Dressing

1/8 cup water
1/4 cup Balsamic vinegar
1/2 cup good virgin olive oil
1 T Mrs. Dash Garlic and Herb seasoning (or any other generic like)

Pour all ingredients in a shaker and...well, SHAKE! You should let it sit for at least 15 minutes before serving and it gets better with age, but try to use it with a couple of weeks.

Now, take fresh mixed baby greens and cut up one Fuji apple (or other sweet,tart, and crunchy kind, tart Asian pears are good too) into chunks and throw on top of the greens. Drizzle ample dressing on top and toss. Add fresh shredded Parmesan cheese and enjoy! This is also great with feta cheese crumbles and sugared nuts.

Saturday, November 18, 2006

Polaroid Reporter Land Camera (Polaroid 87) ~ Reflections


My Apartment, Colorado Springs, CO ~ Dinaripper Creations ©2006 (this image may not be copied, printed, or displayed without permission)

Thursday, November 16, 2006

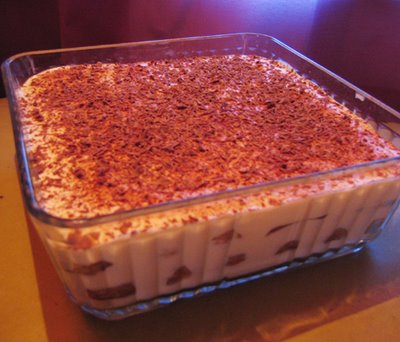
The Best Tiramisu


I've been using this recipe for years now, and it is by far the best Tiramisu recipe. People have ranted and raved over it. So, I've decided to spill the beans and pass it on. I ate it after some lasagna, asparagus with olive oil and garlic and lemon juice, a loaf of good crusty garlic bread, and a nice chianti (insert noise like Hannibal Lecture on "Silence of the Lambs").

Tiramisu

3 eggs, separated
2 cups mascarpone cheese, at room temperature
1 T vanilla sugar (who really has vanilla sugar on hand?? I use sugar and vanilla extract which does not interfere with the integrity of the dessert)
3/4 cup cold, very strong black coffee (I either brew some espresso in the machine, but since it's on the fritz, I've used instant espresso, just follow the directions on the jar)
1/2 cup Kahlua or other coffee-flavored liqueur
18 savoiardi (Italian lady fingers)
sifted cocoa powder and grated bittersweet chocolate, to finish

Put the egg whites in a grease-free bowl and whisk with an electric mixer until stiff peaks form. Put aside.

Mix the mascarpone, sugar, vanilla and egg yolks in a separate large bowl and whisk with the electric mixer until evenly combined. Fold in the egg whites, then put a few spoonfuls of the mixture in the bottom of a large serving bowl (I use a 9x9 glass baking dish with lid which is very pretty) and spread out evenly.

Combine the coffee and liqueur in a shallow dish. Dip ladyfinger in the mixture, turn it quickly so that it becomes saturated but not mushy, and place it on top of the mascarpone in the bowl. Keep adding the dipped ladyfingers side-by-side till you cover one layer.

Spoon in about one-third of the remaining mixture and spread it out. Make more layers in the same way, ending with mascarpone. Level the surface, then sift cocoa powder all over. Cover and chill overnight. Before serving, sprinkle with cocoa and grated chocolate. Serves 6-8 or less if people ask for seconds!

I always have dessert with coffee, and this one is superb with the hints of coffee and it's not very sweet at all other than the ladyfingers. Great to take to a friend's house for dinner!

My First Comestible Creation: Caramelized Onion & Mushroom


Well, I wasn't quite sure how this was going to turn out as I'm not a big bread baker. I haven't mastered the science (and being at a high altitude I'm not sure if that contributes), but I attempted to make a pizza from scratch.

First of all I wanted to make the crust out of whole wheat. I'm a "granola chick" at heart, and wanted to add some extra goodness into an all-time favorite of mine. I used all organic products too, and no meat in this recipe. I'm also a HUGE onion fan. Everyday in Iraq, I ate onions. Yes, even in the morning with my bagel and cream cheese. So I thought that since my pantry is pretty bare (being back only a week now) I did get the staples which includes white onions.

I'm not going to give the recipe for the crust as it turned out alright. I used a recipe from Everyday Food but substituted the all-purpose flour with whole wheat pastry flour. The result was a very dense, very crispy crust. I liked it, but I don't think that most would. The crispiness came from baking the pizza on a preheated stone. I don't think I will do that again in the future as I'm a huge fan of soft and chewy crust, not crispy, but for you crispy crust fans, the preheated stone is the ticket.

The topping was fantastic! I used Balsamic vinegar and lots of garlic. You can't go wrong with a lot of garlic! Here is the simple recipe below. It's a bit time consuming but well worth the wait. You could make it ahead and save it in the fridge for a later time. Either way, I think you'll like the results.

Caramelized Onions & Mushroom Pizza

1 pizza crust (I used a recipe for thick crust)
2 T marinara sauce
8 oz. fresh mozzarella, sliced thin

1 large onion, sliced thin
1 T olive oil
2 T Balsamic vinegar
1/4 cup shredded carrot
5 cloves garlic, crushed
2 large white mushrooms, sliced thin (can use more if you like lots of mushrooms)
2 T vegetable stock
1 t dried rosemary

In heavy saute pan heat olive oil over medium heat, add onions, and saute till brown. Lower heat to low and continue to heat onions till caramel colored (about 20 minutes). Turn heat to medium and add Balsamic vinegar and shredded carrot (this sweetens up the mixture) and cook till carrot is not visible. Add crushed garlic, mushrooms, rosemary and vegetable stock and reduce till liquid is gone. Set aside.

Prepare crust or use premade and drizzle with olive oil, lightly spread marinara sauce, add prepared onion and mushroom mixture, and then evenly space the mozzarella slices. Transfer to hot stone in oven and bake for approximately 20 minutes or until top is temptingly brown.

Slice and enjoy! Makes 8 servings, or 4 servings since I like to eat two slices each time. Good for leftovers too!

Thursday, November 2, 2006

Happy Homecoming!

Hello! I am proud to say that during my time in Iraq I discovered a new blog topic...FOOD! It's quite popular, and I've frequented many delicious food blogs while I was deployed.

Many of you have put up with my whining and complaining about how bad the food was here. Although needless to say that I didn't come home any skinnier! But like all deployments I have come home with a fonder appreciation for good food, and I plan on writing about it! Along with attempting to create some edible concoctions.

So, I am currently in Kuwait (not home yet), but look foward to diving into my new blog!