Tuesday, June 2, 2015

No-Fail (No-Kidding) Peanut Brittle


Peanut brittle is one of my favorite "old fashioned" candy, but I've only made it once or maybe twice because it can be a bit temperamental cooking the conventional way.  Brittle is a bit labor intensive because it takes a long time to cook your sugar to a hard-crack stage and burning is always a worry.  In fact, I think that we [our family] just left this brittle making to our Grandmas to slave over it at Christmas.  Yeah, they only made it once a year because it was a pain-in-the-butt to make.  Until now.

My Dad loves peanut brittle, and for years I've been sending him brittle via the Internet from gourmet stores.  Gawd, the prices were outrageous!  After all, I was leaving the task to making it to someone else.  Sometimes brittle would cost up to $25 for a 2 lbs. gift.  Holy crap.  All of the ingredients are fairly inexpensive, but I am paying for the process of making it.  Until now.

Thanks to my sister, Dori, who gave me this recipe when she came out to visit over Memorial Day weekend.  She had run this recipe through her "test kitchen" many times and was able to get the same, perfect results every time.

My first batch I made was with Habanero pepper and it was pretty hot since we put about a tablespoon in.  That was a bit too hot so I cut down the recipe to 1 teaspoon if you decide to use it, but you can adjust to your taste*.  The sweet caramel flavor is wonderful with a little heat.

When I made this again for this post, I omitted the peppers.  I plan on sending some to my Dad and I know he's old school and prefers it the old fashioned way.  I also made a cashew nut batch.  Yum!

No-Fail (No-Kidding) Peanut Brittle
Yields a little over a pound

1 cup sugar
1/2 cup light corn syrup
1 heaping cup party peanuts (or any other lightly salted nuts) (get your nuts at a bulk or discount store...Dori told me that BIG LOTS is her "go-to" place)
1 tsp vanilla
1 Tbls. butter
1 tsp. finely minced Habanero* pepper (this is optional)
1 tsp fresh baking soda

Line an edged baking sheet with a SILPAT® mat or grease very well (butter or non-stick spray) and set aside.  I recommend that you invest in a couple of the SILPAT® mats.  These are the best for baking or candy making, and I've had mine for 20 years.

In a microwave-safe glass 2-quart bowl,  stir sugar and corn syrup until combined and microwave for 4:00 minutes on HIGH (I have a 1,000 watt microwave).  I recommend that you use a  heat proof silicone spatula.  These are very versatile tools to have in your kitchen.  I have many sizes of the GIR (Get it Right) spatula.

Remove and immediately stir in nuts and microwave for 3:30 minutes on HIGH.

Remove and immediately stir in butter, vanilla, and Habanero peppers (if used),  and microwave for 1:30 minutes on HIGH or until a medium golden brown or a rich caramel color.  The darker color will add a depth of flavor, but be careful not to burn!

Immediately stir and then fold in baking soda.  WORK QUICKLY!  The mixture will foam as you fold it.  Be careful not to over stir or it will collapse.  Pour onto prepared pan and move the pan back and forth to spread out mixture.

Let it cool completely before gently breaking into pieces.  The round back of a heavy ladle or a jar works great for this task.  If you used SILPAT®, you will need to remove it from the mat and place it back onto the baking sheet before breaking into desired sizes.

Store in an airtight container, or you can seal in zip-top bags and it will keep for a week.  Your humidity level will effect freshness as well.  Here in the humid northwest of the country, we have to eat our brittle immediately.  All of it.  We don't like soggy or sticky brittle.  Yeah, that's what we tell ourselves to justify being little brittle pigs.

Enjoy!

*WARNING: to anyone who puts a tablespoon of Habanero in their brittle...do not eat a lot at one time.  We made the mistake of scarfing down the whole pan (minus about 1/3 pound which I gave to the neighbors) throughout the afternoon and all of us were hit with horrible side effects of too much capsicum.  Capsicum is the compound that makes a pepper hot.  Too much can cause diarrhea, and the Habanero has a lot of capsicum...a lot.  I'm not trying to gross you out, but you have been warned.

Saturday, May 30, 2015

Sous Vide for me, please...


I've fought a long-lasting battle against over-cooked meats, eggs, and burgers...until now.  Alas, I have found just a weapon to win my battle.

Behold!  My ANOVA Precision Cooker...a temperature-controller-water-circulating thingie that I can fit into most pots in my house.  Wondering what those little white ball things are in the picture?  No, I'm not cooking giant fish roe.  Be patient young Padiwan...I'll get to that later.

Hey, I don't have anything against shoe leather for all of you "well-done" folks.  It's just that I'd just rather have shoe leather on my feet and not in my tummy.  My oldest brother, Dean, is a "well-done" man.  Or should I say "If it ain't burnt...it's too raw" kind of guy.  Ugh!   
 
I have always been fascinated with the cooking technique used in many a professional kitchen, called "sous vide." Sous...what, you ask?  Sous vide, which simply means "under vacuum" in French.  No, I'm not cooking in a pressure cooker or in my vacuum (ew), but I am vacuum sealing (or putting in zip-top bags) food into pouches and submerging them into a temperature controlled water bath for a certain amount of time.  The results are amazing.  It is truly a blend of science and food.

Here is a perfectly cooked (for 1 1/2 hours) medium-rare (at a constant 136° F) rib-eye steak.  I seasoned the raw steak(s) with lots of fresh ground salt (our million year-old pink stuff) and black pepper and sealed them up using my trusty FoodSaver.  Which I finally replaced with a newer model.  Can you believe the one I had was the first model and I had gotten that in 1999?!  

Anyhoo, back to topic.  You can season your steak however you like.  Olive oil, marinade it (use the FoodSaver for that, it's fantastic!), or anything your taste buds desire.  You then set the ANOVA to the temperature you need (started out with hot tap water), slip the steak(s) in and forget it for the next hour and a half.  You can leave it in the water for up to three hours!  No grill to tend to.  You can actually do other things while you cook perfect (and expensive) cuts of beef.  After it's done, I cut open the pouch and removed the goods.  Then I finish it off (this is a must) by giving it a good sear on all sides of the steak with a butane torch.  Gotta love fire! 

 
Do you notice how this steak is medium-rare all the way through?  None of that over-done meat with a medium-rare center that you achieve from conventional cooking methods.  Regardless of the thickness, all of the meat will be cooked at that perfect temperature.  
Here is a perfectly cooked egg.  Yeah, I'm one of those that likes their eggs super-soft and creamy.  Just like velvet!  It took me awhile to figure this one out, and after cooking and eating five or so eggs, I got it right!  Good thing I love eggs.   This egg was cooked in its shell at 167° F for 14 1/2 minutes.  I usually gobble these up as soon as they are done cooking, but logic would tell me that I could hold eggs at this temperature for some time.  So you could cook a dozen and have them all be perfect for an Eggs Benedict horde.  I'll have to try it out. 
And here is a perfectly cooked hamburger patty.  This photo is not the best, but your burgers don't shrivel up to hockey pucks and you get a succulent, juicy, perfectly medium cooked burger.  We serve our burgers on homemade Brioche hamburger buns.  I'll post that recipe at a later date.  After you have these, you'll never buy store-made again!  Oh, and that's my special melty Velveeta-like cheese (made from just a few ingredients) on the burger.  I'll save that post for a later date too.
I've cooked chicken breasts using sous vide and I must admit that I will be hard pressed to eat white meat any other way.  I've also cooked chicken thighs using my ANOVA, and they were tasty as well.  I have not experimented with fresh veggies yet, since I've been on a meat kick.
 
Yeah, this kitchen gadget may be considered one of those shi-shi, luxury items, but if you are truly annoyed by, or just plain refuse to eat overdone food, I suggest that you give it a try.  I bought this on amazon.com for $179.  It was a reasonable price for me and since a good steak can cost anywhere from 15-20 bucks a one-inch thick slab, then it was money well spent in my opinion.

Oh, those little round things in my pot?  Those are polypropylene balls used to "blanket" the surface of your water as you heat up and cook with.  These simple little orbs help you maintain your heat, therefore saving on electricity.  They also reduce water evaporation, therefore keeping you from having to replenish the water during those hours and hours of cooking.  Hours and hours you say?

Yes, you can cook a cheap, tough-ass cut of meat until it falls apart and it could take hours and hours, but I'll leave that for another time.


Teeny Tiny Korean Food


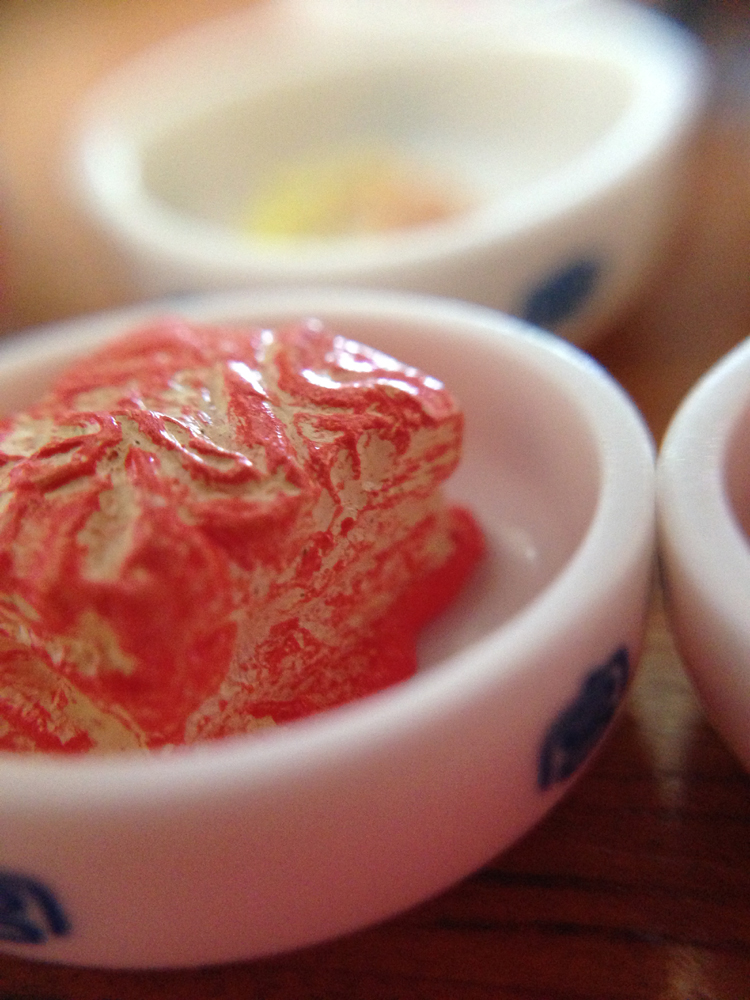
 My sister, Dori came out to visit me during the Memorial Day weekend, and she came bearing gifts.  My favorite thing!  These little gifts were itty-bitty and highly detailed dishes and pots of delicious Korean food.  What a wonderful gift!  A combination of my love for miniatures and Korean food, these were right up my alley.

I spent the good part of this morning capturing each meal (along with a penny to give you an idea of how small they really are) and had to post this.  I used a little lens set given to me by my other sister, Darcie for Christmas last year (or the year before...I can't recall!).  The macro lens worked very well and you would think that these were life-sized by the fine quality.  "Best qwwalrity"...Darcie would say. 

The thought and care used to paint these are evident and each little detail is near perfect.  There were even tiny chopstick, spoons and chopstick rests.  Each item of food and drink had to be placed into each of the dishes.  My favorite is the Gujeolpan, the octagon shaped serving platter.  Each of those wedges and the middle come out as individual dishes.  Amazing!

Friday, May 29, 2015

Krazy for Kalbi


Wow, I've been away from food blogging for way too long!  Well, I'm back and I've got great recipes and food to share with you.

Korean BBQ has become more popular across the country and there aren't many out there who don't like beef kalbi (ribs).  Dale and I love these savory slabs of goodness.  The cut of meat that I usually use is called L.A. Kalbi style (easily identified by the cross cuts of beef short ribs).  It's not traditional but the most common cut for these BBQ'd morsels and a lot of grocery stores carry these. 

I was given a fantastic and authentic Korean kalbi (Thanks, Chris Yi!) marinade recipe and it took me a long time to get around to making it, but I finally did and loved it.

Authentic Korean Kalbi Marinade
Serves about 4 to 6

1 large Korean pear, peeled, cored, and cut up (if you can't find these you can use 2 Bosch or Anjou pears)
1 large white onion, peeled and cut into chunks
1 small can of canned pineapple slices (four rings) and juice
30 cloves of fresh garlic (more or less if you want)
1 cup soy sauce
1/2 cup brown sugar (you can go up to 1 cup if you want it sweeter)
1/2 cup water
1 Tbl. black pepper, ground
2 Tbls. sesame oil
1 Tbl. peanut oil (optional)
2 lbs. L.A. style cut beef spare ribs


Soak meat in cold water for 20 minutes and rinse with cold water several times until water runs clear.  Lay meat out in a non-reactive dish (glass or plastic).  I like to stand my slabs-o-beef on edge so the meat is upright and the marinade can surround it.  Puree all of the other ingredients in a food processor or blender until all is well blended.  It will be thick like runny apple sauce.  Do not dilute. The idea is to coat the meat to tenderize and flavor it.


Pour the marinade on the meat.  Place a piece of plastic wrap over and press to the surface to keep the air from the meat.  Let sit for at least 48 hours in the refrigerator.  You can move the meat around after the first day to ensure that all of the meat is coated.  Don't be tempted to marinade your meat longer as it could turn mushy.  That's not very tasty now is it?

Remove ribs from marinade and cook on hot grill or Korean BBQ grill and cut up with scissors to serve. I usually keep one bone in each piece.  Serve with hot white rice, lettuce leaves (to make wraps), and a variety of Korean kimchis and side dishes.

These are great to put in a Crock Pot and take to a potluck with a rice cooker full of rice.  Believe me, you won't have any leftovers! 

맛있게 드세요! Enjoy your meal!


Thursday, October 17, 2013

Apple Butter v2.0

A coworker gave me a bunch of delicious apples from his tree, and those along with a bag that my neighbor, Patti gave me, I made some apple butter.  Apple butter takes a really long time but it's a labor well worth.  This batch turned out really good and I think a lot of it had to do with the apples I used this time.

Out of the seven pounds of apple puree, this batch only yielded seven half-pints and seven quarter-pints.  I made this the same way in a crock-pot that I made the last batch a few years ago, but this time it was all apples and no pears.

I doled what I had out to relatives and friends and Patti had asked me for a recipe.  So, here it is.  It's more of a method than a recipe but I hope she can get the same great results as I did!  I didn't take any pictures this time, but I'll try to explain the method in as much detail as I can.  So, Patti, if there's anything you don't understand, just ask.  You know where I live!

One could probably half this recipe, but it takes so much time and effort that it's better to make as much as you can!

Awesome Apple Butter

(a little over two and a half quarts finished)

7 lbs. fresh apple puree; I used nice tart apples and I'm not sure what they were but they were not Granny Smith (I'm not sure how many apples this really was, but I peeled, cored, cut, and put them through my trusty food processor and weighed the end results; the plastic grocery bag was really full plus the smaller bag of the other apples)

2 cups brown sugar, tightly packed (I had some dark and some light brown sugar and you can adjust with more or less sugar depending on how tart you like your apple butter; give it a taste, it's good!)

1 Tbl. ground cinnamon
1/2 tsp. freshly grated nutmeg
1/4 tsp. ground cloves
1/4 tsp. Kosher salt
1 Tbl. pure vanilla extract (add this towards the end of cooking)

Mix apples and all spices in a large crock-pot (I estimated that I had about a gallon of apple puree) and cook all day (or night) over low heat for at least 10 hours.  Stir on occasion if you aren't sleeping.  Your house will smell divine!  The mix will be very dark and smooth and you can add more brown sugar during this cooking time if you find your mixture is too tart.  After the initial 10 hours is finished, uncover and add the vanilla and let cook for two more hours in the crock-pot uncovered.  Use an immersion blender or put it back through your food processor once the cooking is done.  Be careful because it's hot.  Your butter should be hot if not very warm when you can it in the jars. 

Your apple butter should be very thick but here is an added step that I do because I like my apple butter to have a paste-like consistency.  I reduce the apple butter in small batches in a non-stick pan until it's very thick and you can run a spatula through it and it holds it's shape or you can dollop some on a plate and it holds it's shape.  I know that this is extra time added on, but it's well worth it because it seems to concentrate the flavor more that you just can't seem to get without cooking it in your crock-pot for another several hours.

Towards the end of the cooking, I prepared all of my canning jars and then jarred all of the apple butter and processed them for about 10 minutes.  Here in Washington the elevation is very low so it didn't take long to get my jars to seal.  There was a small amount left that I just put in a container and put in the fridge for us.  I think the acid in the apples keeps it well since it's been in our fridge for nearly a month now.  You could freeze your apple butter in small containers if you didn't want to jar it. 

Well, that's it.  I'd like to say it's quick and easy, but apple butter is easy but never quick.  Oh, but when we had some on our bagels this morning my taste buds reminded me that it was all worth it.  Now I just have to remember not to give it all away!

Wednesday, September 25, 2013

Nostalgic for Crazy Cake

The phrase "piece of cake" surely fits this long time family favorite we called Crazy Cake.  It's so simple and most of the ingredients are what you may have in your pantry already.  There are no eggs, no dairy, and my dear (and much missed) Grandma Bahls told me one time as she was mixing this up, that this was a cake that many women sent overseas to Soldiers fighting at war.  It was perfect because not only being delicious, it stayed moist, and the ingredients traveled well during the long mail flight or boat trip over to our boys.

I was talking about this cake with one of the lieutenants in our office today.  It's tried and true and pretty much fail proof.  You mix it all in one pan, bake for a short time and all you need is a tub of Cool Whip and you've got yourself a delicious treat!

Crazy Cake

Makes one 9"x13" Cake and makes 12 servings

3 cups flour
2 cups sugar
2 tsp. baking soda (be sure this is not too old)
1/3 cup cocoa powder
1 tsp salt

2 Tbls. white vinegar
3/4 cup vegetable oil (I like canola)
2 tsp. vanilla extract (growing up we always used imitation, but use real)
2 cups water

Preheat oven to 350 degrees F.  In a 9"x13" pan add all of the dry ingredients and mix well with a fork.

Add to the dry mixture the oil, vanilla extract and white vinegar, and then pour the water over all and mix well.  DO NOT BEAT.  The batter will start to get slightly foamy.  Be sure to mix in all of the edges and incorporate all of the dry ingredients.  There will be lumps, but don't worry as these will bake out.

Slip pan into the hot oven and bake for about 35-40 minutes or until a toothpick inserted into the middle comes out clean.

Let cake cool thoroughly and cut and serve with whipped topping and enjoy!


Smelling this cake bake really brings back a lot of good memories.  We were always dessert people, enjoying cake or cookies or pudding or whatnot, and this cake really is comfort food to me.

I plan on taking this cake in to work along with some whipped topping and a recipe card to share.


Tuesday, June 11, 2013

My New Favorite Dessert: Buttermilk Pie

There is a place that Dale and I loved to eat at in Colorado Springs and it's called Rudy's.  It's a place that does great BBQ'd meats (no sauce which I like), and they had these tiny individually wrapped pecan and buttermilk pies.  I used to love to get them to take home after we gorged ourselves on the brisket and pork ribs.

I am proud to say that my pie-making skills are getting better as I'm making more pies.  This was a little over half of the batch of crust that I made the "cookies" with in my previous post.  I wanted plenty of crust to make a nice thick layer with a good healthy edge to work a beautiful crimp.  I'm getting pretty good at it!

Buttermilk Pie

Serves 8

1/2 cup butter, melted
1 1/2 cups sugar
3 eggs, beaten
1 tsp salt
pinch salt
3 Tbl flour
1 cup buttermilk
1 deep dish pie shell (pre-baked )

Preheat oven to 400 degrees F.  Beat the butter and sugar together until light.  Add the eggs and vanilla and beat.  Sift dry ingredients together and add to the batter alternately with the buttermilk and beat until smooth.  Pour into the deep dish pie dish (that has been placed on a sheet pan) and carefully put into the oven.  Bake for 10 minutes and then reduce the heat to 350 degrees F and bake for an additional 50-60 minutes.  Once a  golden brown color has been achieved, cover loosely with foil to prevent over-browning or burning.  The pie is done when an knife is inserted into the center and it comes out clean.

Cool and serve.  This pie will keep on your counter for a few days, if it lasts that long!  We gobbled this pie up!!

I am thinking about entering this into the Ruston bake competition.  Dale won second place last year!

Friday, June 7, 2013

Just Like Mom Used to Make


Whenever my mom would bake a homemade pie with lard in the crust, she would take the crust trimmings from the pie and lay them out on a cookie sheet and sprinkle them with sugar and cinnamon and bake them with the pie.  We loved them!  They were so crisp and light.

So, when today proved to be a cooler day (after a week of sunny weather in the 80's) I decided to make pies.  I made a strawberry rhubarb pie, but that has a top and bottom.  Then I decided to make a pie that I liked and could eat and I picked buttermilk pie.  This has a bottom crust only so that left me with half of my pie crust recipe.

I made a pie crust (recipe on the strawberry rhubarb post) and added one tablespoon of cinnamon.  After the fact I couldn't really taste the cinnamon so next time I will just sprinkle it on the top with the sugar before baking. 

Bake at 400 degrees for about 15 minutes or golden brown and delicious!