Saturday, April 13, 2013

The "Mother" in My Cupboard

I love my NPR (that's National Public Radio for you mainstream folks out there) and I listen to the Podcast of "The Splendid Table" to and from my commute to work.  Well, several listeners have called Lynn (the host of the show) asking advice on what to do with leftover red wine that's gone stale.  I've had this same quandary myself.  Since Dale is not a huge red wine drinker and we decide to have some libation some evening, and I choose wine...I can't (or shouldn't) drink a whole .75L bottle myself.  I can usually go back to a bottle the next day and drink from it after I've stopped the top, but I don't really enjoy that as much.  I haven't cooked much since we've been here in Washington state (deployments, Army, yadda, yadda, yadda...) but using really old opened wine that you think can save for cooking later isn't a good idea.  It turns bad.  So, of course if you put bad wine in your food it's going to make it taste bitter.

Well, back to my first train of thought.  So, Lynn always suggests making your own red wine vinegar.  Hmmmm...I've always been fascinated about it and would love to try it.  So I did.  It's a long process but once you start and it's successful, I'm told that I could be filling my crock for years to come by starting my initial batch with a "mother." Gotta love that alien creepiness about that.  A giant glass jar or ceramic crock.  Preferably one with a spigot like the lovely one I have here purchased from Amazon.com (yes, my favorite go-to-online-shopping-for-everything".

I was explaining this to my friend, Erin and as she's obviously disgusted (her only comments are "Ewwwww!" but I know she's intrigued.  As we are like a lot of what-seems-disgusting but yet we can not NOT look at it.

Here's how I did it:

Homemade Red Wine Vinegar

One, 8 fluid ounce jar (or 1 cup)  of "Mother of Vinegar - Red Wine" (which I just found online from a home-brew website...what the hell, I'm game to give them a shout-out.  homebrew4lew.com  I also bought white wine but that's coming later.)

Not-less-than 1 GAL size glass or ceramic jar (PLASTIC spigot is good for extracting your delicious vinegar)  Basic science here...vinegar is acid and acid and metal don't go together...need I say more?  My jug is a 2 1/2 GAL ceramic style with plastic spigot and came with a plastic ring for the top to nest water bottle atop.

Cheese cloth (thanks again Amazon.com)

2 cups tasty (or was previously tasty at initial opening) red wine (you can buy nice tasting and inexpensive wine just for this purpose, but why??  Use some leftover or save some up until you have at least enough to start with

1 cup water (you can use bottled if you like, but our tap water is good where we live; a suggestion if your water is chlorinated, let the water sit several hours or overnight to ensure the chlorine has evaporated)

So, give your new crock or jar a good rinse and add the following ingredients in.  No need to stir.  Cut or fold layered cheesecloth into a square large enough to cover top and secure with cotton kitchen string, a large rubber band, or do what I did and put the ring on top of the cloth to keep it down. 
Your vinegar will need to breath but you don't want anything falling into your concoction.  Place your creation in a dark and preferably warmish area.

The idea temperature that the "mother" works her magic at is 80 degrees, but that's pretty hot to me.  I think cooler temperatures just slows down the process, so you don't have to increase your heating bill to keep your "mother" happy.  Just don't let her starve!  When she starts doing her magic, don't be freaked out.  She'll start to form a sort of...leathery scum and sink to the bottom over time.  If this isn't happening...then your "mother" is probably dead.  Sniff.  But if your "mother" is looking pretty grodie...you're on the right path.  You can then fish out some of the old sloughs of "mother" and put them in a jar with some liquid and give it to friends or anyone else willing to venture out.

Wait one week and start feeding your "mother" a cup of red wine on the first day of the initial waiting period, then another cup the third and fifth day.  I guess that's it.  In about three months this will develop into some delicious red wine vinegar.  You can keep feeding your jar over time and keep the red wine vinegar production going.  I've heard that there will be differences in the flavor of the mature vinegar as time passes and what you put into it.  You should just stick to red wine though, but I guess there are people that throw in white as well.  I have read that you never want to put wine in your jug that has any trace of cork.  Pee-Ew...who likes cork in their wine anyway?  Plus someone may need to to wine bottle opening 101!  Ha!

I guess this will be trial and error and I truthfully, I can't wait until the magic starts to happen!  I'm keeping a log of my "mother's" progress on the side of the crock with a Sharpie.  So, I started out cheap with some Two-Buck-Chuck (I likie) and have a pricier wine to add on Monday. 

Perhaps I should just make a Two-Buck-Chuck Red Wine Vinegar and try to sell it back to Trader Joes!  Ha!  That's would be a hoot!

I will keep everyone up to date on the progress of My "Mother" in My Cupboard!!

Now I have to go drink some red wine...poor me.


Thursday, November 8, 2012

Comestibles on KAF?

Ah, here I am deployed yet again.  I fear that as long as I'm in the Army I will deploy many more times after. I am in Afghanistan instead of Iraq this time.  Although the quality of life and even job is "better and easier" I'm not going to lie...it still stinks.  Literally it stinks here on Kandahar Airfield thanks to a giant quad pool of human excrement and nastiness.  But enough about that as Comestible Creations is about savoring and relishing good food and drink and other stuff.

However, the food here does stink and everyone at home should appreciate the delicious bounty to choose from either at a grocery store or a nice restaurant.

Yeah, yeah, I've had worse deployments but I don't live in the past.  I live in the now, and now the food is gross and makes me want to throw up a little bit.  I'm glad that others share my woes and frustrations of the dining facilities (DFACs) here. A friend of mine, Chris turned me onto this humorous and very truthful blog called Just DFACS Ma'am.  Reading this makes me laugh and gives me some comfort to know that I'm not the only one with working taste buds.

I've also been inspired to post on my blog now even though I'm not cooking.  Well, I do "cook" per say in my room with the occasional ramen noodle cup, but you can hardly call plugging in an electric kettle to boil water cooking.  Like I said before, I live in the now.

Sunday, May 13, 2012

Butter Chicken

Dale and I were introduced to butter chicken at his farewell lunch from his section at Fort Carson.  They chose an Indian restaurant that was very good and one of the officers that was being "farwelled" along with him told us about his favorite dish...butter chicken.  We ordered it and thought it was very good!

When we were going through Trader Joe's we picked up butter chicken in the frozen dinner form that had a serving of chicken with sauce and basamati rice.  It was pretty good as well, but I thought it was a bit expensive for the portions.  Of course I thought to myself "I could make this!"  So I did.

It's fairly inexpensive, but only once you've made your garam masala mix.  This is a blend of spices that makes one super spice blend that's just heavenly.  It can be a bit costly, but then again, spices are costly, as they have always been throughout the existence of civilization.  I had some spices on hand, but I think it would be best to start fresh and grind your own when you can.  Once you whip up your garam masala you can keep it for all sorts of future Indian dishes so the initial cost does go a long way.  Plus if you do buy spices in their whole form, you can make little batches and keep that.  The whole form spices store longer and are fresher and more pungent when you grind them.  It's up to you.  I'm a bit lazy and just whipped up a whole lot of it.

Super Easy Garam Masala
(12 servings)

I tripled the recipe below (so that's 36 servings) and sealed it in a container for later use and used whole spices and ground them in my Bullet!  Yes, the one AS SEEN ON TV!  You could use a clean coffee bean grinder, but be sure to grind them fine.

1 T ground cumin
1 1/2 tsp ground coriander
1 1/2 tsp ground cardamon (this comes in pods and you have to shell them first and grind the seeds inside; totally worth it)
1 1/2 tsp ground pepper
1 tsp ground cinnamon
1/2 tsp ground cloves
1/2 tsp ground nutmeg

Put all ingredients in an airtight container and shake until thoroughly mixed.

Chicken Makhani (Indian Butter Chicken)
(serves 4)

I doubled the below recipe when I made it, but prepared them in two portions as my pan was way too small.  I put the first portion into a container and threw it into the freezer for another spicy Indian day.

For the Sauce:

1 T peanut oil
1 shallot, finely chopped
1/4 white onion, chopped
2 T butter
2 tsp lemon juice
1 T ginger garlic paste (I found separate tubes of ginger and garlic paste near the fresh herbs section at Safeway)
1 tsp garam masala
1 tsp chili powder
1 tsp ground cumin
1 bay leaf
1/4 cup plain yogurt (fat free is fine)
1 cup half-and-half
1 cup tomato puree
1/4 tsp cayenne pepper, or to taste
1 pinch of salt
1 pinch black pepper

For the Chicken:

1 T peanut oil
1 lb boneless, skinless chicken thighs, cut into bite-sized pieces (you can use breast meat, but I think dark meat tastes way, way, way better.  But that's just me.)
1 tsp garam masala (yup, more yet and so worth it)
1 pinch cayenne pepper
1 T corn starch
1/4 cup cold water

*NOTE:  Mise en place...learn it...live it.  Prep all your stuff before you start.  Chop and measure and all that jazz with all ingredients and then put them into small bowls and dishes.  You don't have to have a ton of dishes (I hate washing dishes) but you can put ingredients into groups by when you're going to use them.  For example: all of the spices were measure and put in a tiny bowl along with the bay leaf, and the ginger garlic paste was put in with the lemon juice.  You can see this in one of the photos.  Just use your best judgement.  Either way, doing this in some sort of order every time you cook helps make life in the kitchen so much easier, and it looks more impressive if you're cooking in front of an audience!  Read about mise en place in this past post.

In a large sauce pan (I had to swap out pans since the one I started out with was way too small!  Oh well, live and learn), heat up the peanut oil over medium heat.  Add your shallots and onion and cook until they are translucent (yes, the shallots are missing in my picture and if you can't get them, it's fine).  Add the butter, ginger garlic paste, all of the spices (for the sauce portion of the recipe) and the bay leaf.  Stir vigorously and cook for a minute or two.  The fragrance that will be wafting up and out of the pan, greeting your nose will be like nothing you have ever smelled!  It's pure Nirvana and will make the house smell wonderful.  When I was at this step I heard Dale exclaim from the other room, "WOW!  That smells great!"  Oh yeah!

Add the tomato puree and cook for a few more minutes, stirring frequently.  Stir in the yoghurt and the half-and-half and keep stirring until it has heated through.  Turn the heat down to low.  The sauce will looked curdled, but don't fret.  This is the reaction from adding dairy to something with acid (lemon juice).  Keep the faith.  Your dish will not be lost!  Simmer for about ten more minutes and stir frequently and add salt and pepper to taste.  Take this off the heat and set aside near your stove.  You'll be needing this in just a few minutes.  I added some dry chilies in the hopes I could make it even more hotter.  Yeah, I like to try to reach the highest heights of heat enlightenment!

In a large saute pan, heat up more peanut oil over medium-high heat.  Don't worry about it smoking.  Peanut oil can withstand super high temperatures.  Think about what you cook all of those deep-fried turkeys in!  Brown your chicken and then add the additional spices and stir.  More delicious aromas will fill the air.  Continue to brown your chicken and keep the heat where it's at.  All of this portion shouldn't really take much time.  Good thing you followed the mis en place guideline!

*NOTE: The next is my own method.  When I read the original recipe I was working off of, the method didn't really seam to make sense to achieve a thick and creamy sauce after looking at the sauce I had just made and set aside.  So I just followed my gut-instinct and did the following:

Ladle a portion (I have 1 cup ladles) of the sauce into the hot pan.  This will help deglaze the pan, pulling up all the lovely brown chickeny (that's a word that Julia Child liked to use and I'm rather fond of it) bits and stuff, and reduce the sauce.  Cook and reduce your sauce and stir constantly.  Don't worry, you won't burn it if you're awake and paying attention!  Keep adding the sauce by ladlefuls, all the time letting the sauce reduce more in between additions.  Once you get all of your sauce onto the chicken and it looks fairly creamy but it's still a bit runny, turn the heat off.  Stir up your cornstarch and water and pour this into your sauce and stir quickly.  Your sauce will thicken more and more and coat the chicken, making it look like it should.

I also added this last finish by stirring in a couple more tablespoons of butter (or more!) into the chicken and sauce.  It really does "round" out the finished dish and what the hell...it's BUTTER chicken after all!

Serve immediately over hot basamti rice and serve with naan if you have it.

This dish is definitely one I will remake!  Well, after I serve up the frozen portion later.  This does freeze beautifully and so does rice.  So, I made a bunch of rice for both of the meals.

Try cooking this one yourself!  Like I said, after you get done shelling out some cash for the base of spices for your own garam masala (or if you can find it already blended, even better!) your doorway to Indian cuisine has only just opened into a new world of flavor intensities!  You could probably do this vegetarian if you would like with cauliflower or that super-rubbery Indian cheese.  I'm not sure what that is...

Anyhoo, anyway you cook it, it's definitely an easy dish and sure to please most!  Enjoy!


आप का खाना स्वादिष्टहो (āp kā khānā svādiṣṭa ho) - good eating!

Tuesday, May 8, 2012

Squished Game Hens

Here is my first post from Ruston, Washington!  I made this dish a few weeks ago and I had to tap into my Iron Chef skills.  I bought these little game hens to make into this delicious Korean soup.  It had been cold and rainy and soup sounded great.  Well, I took them out to thaw and the moment I decided to make them it was a beautiful day!  So much for the comforting soup on the cold and dreary day.  So, I came up with my own brick style chicken.

Squished Chicken (Game Hens really) & Garlic Butter Broccolini
Serves 2 slightly hungry persons or 1 pretty hungry person

2 Cornish Game Hens, cleaned and patted dry and butterflied (see my technique written below)
Slap Yo Mama spice (I picked this up in Houston and it's pretty spicy, or whatever you want to use)
non-stick spray
manual panini press or a couple of heavy bricks (yes bricks, new and clean) wrapped in heavy-duty foil
Bunch of Broccolini, cleaned and split into thinner strips if you like (I like)
3-4 cloves crushed garlic (the more the better I say)
Olive Oil
Butter (Come on!  Go for the reals stuff!  We don't need no steenk-ing margarine!)
squeeze of lemon juice if you so desire
Preheat your oven to about 475°F (you want it good and hot).
  
Take the hens and use a good hefty pair of kitchen shears to cut out the backbone.  Don't be a chicken, you have to be aggressive even in little birds like these. I save the backs in a baggie and throw them in the freezer for use at a later date.  These leftovers are great for stock.  But back to the job at hand!  Clip off the wings and throw them into your stock bag.  Wings from a game hen are pretty much tooth picks and will just burn cooking with this method.

After you've removed the backbones from both, flip them over and spread out the hens as flat as you can.  Then, using the palm of your hand press firmly down and bust their little breast bones.  So cruel I know, but relax, they won't feel a thing (they're dead!) and you want them to lay down as flat as possible for even cooking.
Make sure your hens are pretty dry and season liberally front and back with the Slap Yo Mama (or whatever you'd like to season them with).  Keep in mind that you can use Mrs. Dash or something non-sodium, but the salt helps crisp up the skin.  It's up to you but I loves me some crispy skin!  Spray them front and back with non-stick spray.  Don't worry if you blast off some of the seasoning because you can reapply.


Get a grill pan nice and hot (med-high heat, more on the higher side if you get my drift) and be sure that it's a pan you can put in the oven.  Put hens in breast side down to sear.  There will be a lot of steam but now is the time to be fearless.  Apply the panini press or bricks.  You want to weight your birds down to get as much surface to the hot pan.  Let sear for about 2-3 minutes and flip over and reapply the weights and sear for an additional 2-3 minutes.  The searing time really depends on how it looks.  If it's pale and not appetizing at all, sear some more.  If it looks like you could tear into right away because it's so mouth-watering brown, then you're about right.  Don't tear into it though!  It's still raw on the inside!
The skin should have nice grill marks and be golden, brown and delicious! With the weight still on pop the whole thing into the hot oven and continue to cook for about 8-10 minutes or until there is no blood or pink at the leg and thigh joint.  Be sure you have a good grip on this because the weights can be heavy!  You'll hear a ton of popping and sizzling but these are the sounds of goodness cooking up in the pan.  Do not flip the birds.  They can just finish as they are in the hot oven.  It's okay to throw them back in if they are still a bit underdone.

When the hens are cooked to perfection, take them out and let them rest on a board, tented with some foil.  I let them rest about 5 minutes or so.  This gives me time to de-glaze the grill pan or you can just reserve the super-condensed and nearly sticky juice to pour on top before serving.  If you do de-glaze, use a little water or maybe some white wine.  You're not making an elaborate sauce here.  You just want to get up all of those mouth watering brown bits and stuff on the pan.  Now while your hens are taking a rest, it is time to saute up your broccolini.

In a hot (medium-high heat) saute pan pour in about a tablespoon or so of olive oil and the crushed garlic.  Then throw in your broccolini.  Do this quickly to brown your garlic but not burn.  Toss the broccolini and cook until bright green and tender crisp.  This will only take a couple of minutes if even that.  Right before you shut the heat off, toss in a healthy nob of butter and melt.  It'll sizzle and help lift all of that browned garlic from the pan.  Serve on a warmed platter and squeeze lemon juice on top if you wish and a little kosher salt and fresh ground black pepper

Plate your squished hens onto another warm platter and drizzle the pan juices on top.  Serve with warm bread of your choice.  I served some warmed up naan that we picked up from our Trader Joes.  How in the world did I ever do without them this long?

We dined alfresco on the porch (on a table of course) and Dale and I dug in.  The hens were so succulent and the broccolini was so fresh and crisp that it didn't take long for us to let our animal instincts kick and in reduced the hens to a pile of little bones.  What a wonderful thing to serve on a beautiful day!  Give it a try.  Remember, it's really all about timing so be sure you prep everything before you start cooking.  It's fun and simple and quite impressive to serve up!

Enjoy!

Greeting from Puget Sound!

Wow, I'm so behind on cooking and posting.  Well, I've been cooking, but nothing extravagant and definitely nothing to shout about or even blog.  Dale and I spent all of March and most of April packing and moving and unpacking and moving into our new home in Ruston, Washington.  We love it!

I promise I will start cooking and posting some great food!  I am slated to got to Afghanistan next month for 9 months or so, but I will try to make some nice dishes for Dale and myself before I head off.  Until then!

Tuesday, September 20, 2011

A Passage to India

My friend, John and I went out on Sunday to catch up and eat good food. We went to a place on 8th street called "Little Nepal" and it was pretty good. I ordered a kick-ass super-spicy dish called Lamb Madras. I always order lamb if it's on the menu and it's a bonus if I can get it spicy. Indian spicy is how I ordered it. Oh yeah.

Well, I brought half of it home and stuck it in the fridge. Last night I ate half of that and tonight I thought I'd pull a little "Iron Leftover-Chef" and think of something creative to make with the other half of my Indian dish.

Have you every heard of roti? It's a type of Indian bread and you can stuff it if you'd like. In fact that's really the only way I've eaten roti. Tonight I made my own version. I don't have a Tandori oven. Actually I was told the other night by the Indian guy that waited on us that you'd need about $8,000 to get a really good Tandori oven. Then he went on how it had to pass the inspection, electrical specs...blah, blah, blah... I improvised using my grill pan set on high heat (and then lowered later).

Here is my version of roti using some pizza dough that my friend, Carmen was gracious enough to let me have. We made pizzas on Saturday when I took the new Jetta up to Highlands Ranch.

Lamb Madras Roti

1/2 cup give or take Lamb Madras leftovers with some basmati rice (or any good Indian curry, vindaloo, masala, etc.)
4 oz. raw pizza dough or about the size of a tennis ball (bread dough, refrigerated biscuits in the can that scare the bejeezus out of you when you pop them open, etc. - you can use wheat bread dough)
2-1/4" slices fresh mozzarella cheese (I added this because I love cheese)

Preheat your grill pan over medium high to high heat. You want it to be fairly hot so you can "sear" the dough and make it kind of crunchy. Remember, think Tandori oven. Think of naan. Yum...naaaan...

Mix the rice and Lamb Madras (cut any large pieces of lamb into smaller bits) in a small bowl and set aside. Take the dough and flatten it out into an oblong shape. You can roll it out on a board dusted with some flour if you'd like. I didn't because I wanted the dough to pinch close.

Tear up one slice of the fresh mozzarella and place on one end of the dough and spoon the leftovers on top and spread out but not all the way to the edges. Place the other broken up piece of cheese on top.

Fold the other half of the dough over and pinch the edges all around to get a good seal. Be careful not to put holes into your raw roti. If you do just pinch. You may have to force the air out and flatten the roti a bit.

Put the roti in your hot grill pan and turn over when you have a nice brown and crunchy dough. Turn down the heat to medium and cover it with a lid (domed if you have it) and cook for about 3-5 minutes. Be sure not to burn it. Flip over and cook again for another 3-5 minutes. The roti should be nicely browned and not doughy.

Wow, this was really good. The Lamb Madras was pretty hot and it tasted so good in this bread with the melted fresh cheese. This really would be great with any type of "gravy" Indian dish. You could make little mini rotis if you were up to it. Maybe I'll have to do that in the future and post that method.

Next time you bring home Indian food give this a try! You won't be disappointed! Lamstina, until next time!

Sunday, September 18, 2011

Eggies! It's Not Rocket Science!

So, I was at "the Walmart" tonight looking for a jug of foaming soap for my soap dispensers at home. To no avail I was not able to find the damned soap but I did find this little gadget. The thing with not having cable or antenna attached to our television is that we don't get those infomercials. Most people can live without them, but to tell you truth, I love em'!

Why just this very day I boiled up some eggs and they were so hard to peel that I practically shredded them up trying to get the shell off. So, I saw these little doohickies and thought I'd give them a try.

After looking at the actual infomercial on the Internet I got the gist of what they were trying to sell. Convenient hard boiled eggs that you can season before you cook and you don't have to worry about those messy shells. Easy enough. Looking at the package the design seemed like it could deliver what it said.

Well, I also looked on YouTube and saw some "consumer reviews" of the Eggies and I'm sad to say that most were not good. They complained that the egg would ooze out while they cooked, that they looked really funky shaped, etc. Well, I was going to try making some whenever I had a hankering for more hard cooked eggs, but I couldn't resist. I mean, how hard could this be?

I looked at the the construction of the cups and there were little seals that appeared that they would keep egg matter from seeping out into the boiling water. That was a huge complaint. Another complaint was that the eggs got stuck in the cups. Um...the directions specifically say to spray cooking spray or oil onto a paper towel and coat each cup bottom and top with an even coat. Not too complicated.

So the most difficult thing I thought was to crack that egg into that little hole where the lid screwed in. I did spill some of the white on the first cup and I was leery that the yolk would bust, but the raw egg slipped in well. I was sure to screw the ring in the middle quite firmly, and same with the lid. Then I slipped them into my pan of hot water that was already sitting over a flame.

These eggs do take a long time to cook in comparison to the normal way I boil eggs. If I want soft I time 3 minutes from the the time they boil, but in these little Eggies it takes a bit longer. Really, these are just egg coddlers and I've been looking for some of these. I brought the Eggies to a boil and actually popped a lid on top. It didn't seem to hurt the cups at all.

So, one egg I plucked out early (10 minutes) and it was nice and soft, but I could have taken it out sooner I think. Less time for true coddled eggs. Some people eek out over soft whites, but I love them. The other egg I boiled 15 minutes and the yolk was still a bit soft, but I could have just let it hang out in the hot water after I shut the flame off and I'm sure it would have finished nicely with the residual heat.

I don't know what the big fuss was. I think people just slap these things together without really understanding that they need to secure the thing together quite tightly. Plus they fill them way too much if they are using the egg substitute that comes in a carton. I'll have to try that some other time, however what would be the reason for that?? There's no shell you're trying to avoid.

So all in all I was quite successful and with a little more testing with cooking times I could be enjoying my eggs any softness/hardness I so choose. The only thing that throws me off is the shape. It's like a giant bonbon, or something rubbery some flat chested girl would try to stuff into her bra, or a scoop of mashed potatoes the lunch lady slapped on your tray in high school, but you know what? I don't really care because it beats the poor egg I attempted to peel this morning that looked like it had wobbled onto a landmine.

If you have some time to kill and you love "AS SEEN ON TV" crap like me, give these bad boys a try. They are fun for kids I think and remember, you don't have to have a PhD to use these! They are about ten bucks for six and a egg separator. I'm donating the separator, and I may donate the actual Eggies once the novelty wears off...or who knows...these may be as crucial in my kitchen as my trusty All-Clad...

Get out your kosher salt and your pepper grinder and enjoy an Incredible Edible Egg!

Tuesday, September 13, 2011

Operation Clean Freezer: Fried Ravioli: Round 2

My friend, Mindy (by the way, forgot to tell you that your new tattoos ROCK!) asked me about my past fried ravioli technique and wanted to know if it had to be the fresh type pasta. I would have to say yes it does, but you don't have to use the refrigerated or thawed kind as I did in the previous post last year. I did a test tonight on cooking up some frozen ravioli that I had hibernating in the freezer. It was a package of Portobello ravioli with two cheeses that I bought from Costco.

Look closely and you can see the frost on the inside of the package. That is one of the downfalls of being "single" and shopping at a bulk place. Too much food and it ends up drying out and mummifying in the freezer, but no worries. Frying covers up many sins and makes loads of things taste yummy regardless of condition.

Deep Fried Frozen Ravioli

Frozen jumbo ravioli, any flavor your wee heart desires (you can use small ones too if you'd like, just be sure you don't burn)
Oil for frying

Heat up enough oil in a pan with a thermometer or use a fancy pants submersion deep fryer that keeps a constant temperature and has a basket that lifts out. I have both but I'm only frying for just me. I don't pull out the big guns unless I have an Army to feed mounds of fried stuff to (I have made massive amounts of Lumpia that I did indeed feed to an Army and will post that sometime soon). Heat the oil (whatever the amount) to around 350° F. Be careful not to get it too hot as you want to heat the frozen middles without making the outside look like Kingsford charcoal briquettes.

Once the oil comes to temperature fry frozen ravioli in small batches using a slotted spoon to place into the hot oil. BE VERY CAREFUL when frying frozen stuff as there may be ice crystals and we all know that hot oil and water do not mix! You may want to use a spatter screen or it may be good to use your fancy pants submersion fryer. Just use caution and this is something you don't want your kids or someone who isn't very handy in the kitchen to do.

Try to keep the oil temperature constant by turning up the fire a little higher to compensate for the cold stuff and turning it down once it's recovered to the approximate temperature needed to make your ravioli golden, brown, and delicious on the outside and nice and gooey hotness on the inside.

Try this the next time you want to use up some leftovers or too much left in the freezer from those jumbo packs we Americans love to buy at giant warehouses!

You could fry up some cold ravioli that you had even cooked too. You know, the dry kind that has been cooked. However, I'll have to try that out in my trusty test kitchen and let you know how that tastes.

If you use a pretty hearty ravioli like a meat with a thick pasta, serve up with your favorite marinara. Because the flavor of these were pretty delicate I just scarfed them down plain. But you know what would have been really good if I hadn't been so greedy and wanted instant gratification? Perhaps dip these in a light vinegar and oil dressing or a bottled Italian dressing cut with a teeny bit of water. I just put fresh black pepper on them and *POOF!* Hey, where did all my fried ravioli go??

Give this a try, Mindy and I hope you enjoy!

Monday, September 12, 2011

S'cuse me while I whip this out...

So, it's been far too long since I've posted anything and this is mainly due to the reason that it's been far too long that I've cooked anything. Since Dale left a year ago I have not cooked any creations, or at least very few. Sad huh, but the good thing is that I've lost 15 lbs.

I promise to get my ass back into the kitchen. I promise to dust off that insanely expensive camera I have. I promise to bring forth and make fat again.

If anyone is out there reading this.

Sunday, December 5, 2010

Operation Clean Fridge: Fried Ravioli

I took out a package of chicken and mozzarella ravioli from the freezer but the package was so big that I could only eat a little bit of it. I put the rest of it into a zip-lock bag and nearly forgot about it in the fridge. Until tonight.

I have a jar of frying oil in the fridge and I tapped into that and put it into a small pan. I only needed less than two inches of oil to fry since there wasn't a lot to cook. I only cooked two at a time too because the pan was so small and the ravioli had a tendency to stick together if they were too crowded. It's really very simple and you fry the uncooked (don't boil it) ravioli. A person could deep fry tortellini too. That would be delicious! Now remember that this really only works with the "fresh" type stuffed pasta. It's like a wonton.

The finished dish was yummy! I had this for dinner tonight with a dish of pasta sauce on the side. A salad would have been good with this but I haven't had salad since Dale left. He makes the best dressing! I miss him!

Saturday, December 4, 2010

Beautiful Blackberry Jam

I've been on this kick to make all of my Christmas gifts this year and I've been having a ball (the pun was intended for those of you who know the "ball" reference) with canning. I made the pear-apple butter, which I've enjoyed because there was a smudge of it left that I couldn't can. I had it on a toasted bagel this morning and it was yummy! For those of you who really know me, I'm not a fruit person and definitely not a fruit spread person.

Today I was at Costco and the blackberries looked really good. So I grabbed four cartons of them and headed off to my local Ace Hardware store. They have a large canning section and I picked up some nice 1/2 pint jars and a flat of cute little 1/4 pints ones too. Those will be my office gifts. I'm going to make more pear-apple butter tomorrow and more bacon jam too.

I was really surprised by how easy it was to make fresh jam and I was glad I found a recipe that didn't call for any sugar. Looking at some of the recipes (online and on the pectin box) regular jam called for so much sugar. Nearly 4 cups per batch! So I found one that used honey instead of sugar and I was sure to get the pectin for no added sugar.

Blackberry Jam

One Batch Makes About 4 1/2 Cups (only make one batch at a time as you cannot double jam and get it to thicken properly)

2 and 1/4 pounds fresh blackberries (about 8 cups)
2 tablespoons lemon juice
2/3 cup honey
1 package of fruit pectin for no sugar added (like I said I got mine at my Ace Hardware store but I'm sure you can find it in your grocery store, even off season)

Prepare your jars, rings, and lids for canning and have your water bath near boiling. I got two 1/2 pints and five 1/4 pints from one batch. Or you could make two pint jars if you go through jam quickly.

Sort through, wash, and drain the berries then put them in a large pot. Take a potato masher and thoroughly mash the berries until there are no whole berries and then add the lemon juice. In another bowl mix the honey with the packet of pectin and set aside but within reach of the stove.

Put the pot on the stove over high heat and bring to a boil, stirring continuously so you don't burn it. Don't worry, if you pay attention and keep stirring burning is practically impossible. Like I said, I was really surprised by how easy it was to make.

As your mixture is boiling add the honey and pectin mixture. This will melt in and keep stirring. Once your jam has come to a vigorous boil time for about 3 minutes. I timed my boil at 4 minutes because of the altitude. Turn off the heat. The jam will be thicker but still runny.

Pour the jam into the jars, place on lids and rings and processes according to jar size. Let cool and seal. I applied labels with the ingredients listed. I think these are really pretty and the jam set up nicely because of the pectin. I actually tasted it and because there was only a small amount of honey the jam was a bit tangy and I thought tasted a bit like cherries. It was pretty good. Maybe my taste buds are changing as I'm getting older.

Sunday, November 28, 2010

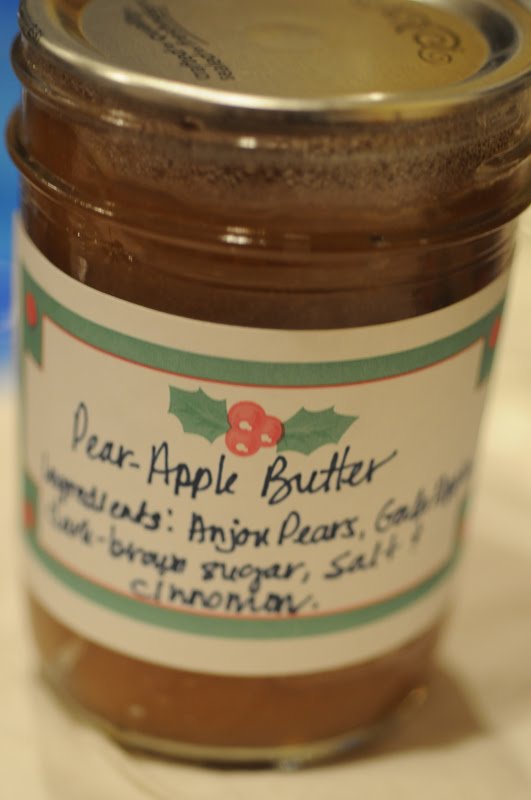
Pear-Apple Butter

Wow, this is a lot of work for very little yield but I must admit that it was worth it. I must say that I even liked the finished product. I'm not a fan of pears or apples cooked (I don't like pears raw, but I do like apples) and when my butter was going through the cooking process it was at a stage of being sauce at one time and I thought...GAG! After 3-4 hours late it was looking and smelling pretty good to me and I tried some and I liked it! It was nice and sweet and slightly tangy. The flavors were very simple and intense and I could taste the blend of pear and apple. Now I just have to make more since I only ended up with 4 half pints.

Pear-Apple Butter

Yields 4 Cups (I recommend that you double this just to make the time worth while...it takes a long time but so worth it)

2 1/2 pounds Gala apples
2 1/2 pounds Anjou pears
1 cup packed dark-brown sugar
1/2 teaspoon Kosher salt
1 cinnamon stick

Peel, quarter, and core all of the apples and the pears. This takes some time, but if you're good with a paring knife this shouldn't be too painful. Take the fruit and chop it up (in batches if you need to) in a food processor. Don't worry if the puree starts to turn brown because you'll be cooking the bejeezus out of it. Put the puree into a large slow cooker and cook covered on high for four hours. Carefully puree until smooth (in batches if you need to) in the food processor and put back into the slow cooker uncovered for four more hours. It will not burn but turn dark and thick.

I made the mistake of putting the fruit into my larger slow cooker for one batch. So I transferred it to my smaller one, but by then it had taken forever to reduce down. If you double the batch the larger cooker will be fine. I finished the butter in a non-stick pan over medium heat, stirring constantly until the fruit was very, very thick and there wasn't much moisture. It should be able to hold it's shape if you stir it up with a rubber spatula and look a bit like canned pumpkin.

While the mixture is still hot fill your hot jars for canning. Process half pints according to the directions. I did mine for 12 minutes because of the high altitude.

I can't wait to give this as gifts! I'm planning on making a double batch again very soon!

Bacon Makes Everything Taste Better...


...practically! Who doesn't agree? And if you don't, you're crazy!

The very words bacon jam bring two reactions. Either sheer delight or sheer disgust. Hey, don't knock it until you try it! This would be wonderful on a warm biscuit or a piece of buttered toast or even a juicy burger. The below recipe is doubled because since it takes quite a bit of time it's best to get your times worth.

Bacon Jam

Yields 5 Cup

3 pounds of slice bacon, cut crosswise into 1-inch pieces (this doesn't have to be the top quality thick sliced bacon, in fact the cheaper stuff is great for this because it's usually sliced really thin)
4 medium yellow onions, diced small
6 garlic cloves, smashed and peeled (I use the jarred chopped garlic)
1 cup cider vinegar
1 cup packed dark-brown sugar
1/2 cup pure maple syrup
1 1/2 cup brewed black coffee

I used my electric frying pan, cook bacon over medium-high heat, stirring occasionally, until fat is rendered and bacon is lightly browned (about 20 minutes, and I had to do this in batches since I doubled the recipe. That's right...three pounds of love!). With a slotted spoon transfer the bacon to paper towels to drain. Pour off all but 1 tablespoon fat from skillet. Save the rest in a jar in the fridge. Bacon fat is delicious in all sorts of things!

In the skillet add the onions and garlic and cook until onions are translucent (about 6 minutes). Add vinegar, brown sugar, maple syrup, and black coffee and bring to a boil, stirring and scraping all of the brown bits (about 2 minutes). Add bacon and stir to combine and slowly simmer on low (simmer setting) in the pan for 1 hour. The slow simmering intensifies the flavor. There will be quite a bit of juice leftover after simmering. Turn up heat and simmer at medium heat until the juice has reduced to a nice syrup.

Shut off heat and put mixture into a food processor and pulse until coarsely chopped. Your mixture will have a jam texture. I then put the jam back into the pan on warm setting and added 2 teaspoons of cider vinegar. After tasting the jam it was nice and sweet and the extra added cider gives it a bit of a zing.

I heated up water, sterilized my half pint jars, lids, rings, and all utensils then I brought my water bath to a boil. Putting the mixture back in the pan kept it warm. You want warm jam to put into the warm sterile jars. I filled to the threads (you need head-space) and put on the sterile lids (boiled these in a separate pan...that's what my Mom always did) and screwed on a ring until finger tight.

I put my filled jars into the water bath and brought it to a boil. Once it started boiling I timed 11 minutes. Normally at sea level the processing time is only 5 minutes, but I am 6,000 feet above and I had to add a minute processing for each 1,000 feet. It seemed to do the trick since all of my bacon jam jars sealed!

Neato! I wrote out cute labels I had with the name and ingredients. I can't wait to give these as gifts. I think I'm going to have to make another batch. I don't think that 5 jars are enough to give out. I tried some on a little bagel and it was very good and rich. A little will do, but that's all you need to savor the wonderful taste of this delectable jam! Enjoy!